Dad came over in October to help me adjust a few things with Lucy, I had been leaking coolant from somewhere and I suspected a leaky head gasket. I was using Lucy as a daily driver to and from work and I was getting a white sludge under the filler cap.
We did a leakdown test and nothing showed as leaking. Secondarily we decided to do a compression test and it turns out cylinder three had zero compression.
Soo... In early January I decided to get the head off. To do so the following steps need observing (not necessarily in this order)...
1. Coolant needs draining. I did this by removing the lower hose on my radiator and letting the juices flow.
2. Remove Thermostat hose and housing.
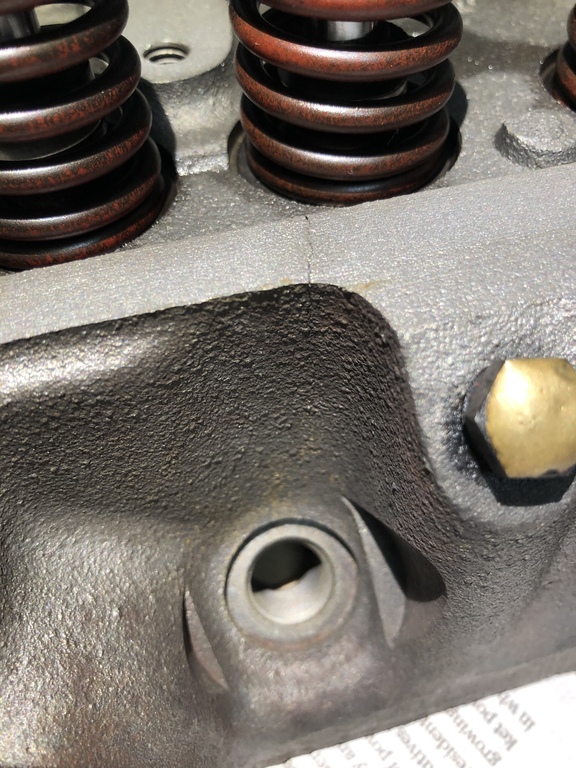
3. Remove carburetor.
4. Remove exhaust manifold (I ended up having to loosen the clamp on my exhaust below the car)
5. Remove hoses and such from emissions systems attached to rocker cover.
6. Remove temperature sensor
7. Remove temperature control thingy for heater
8. Remove spark plugs.
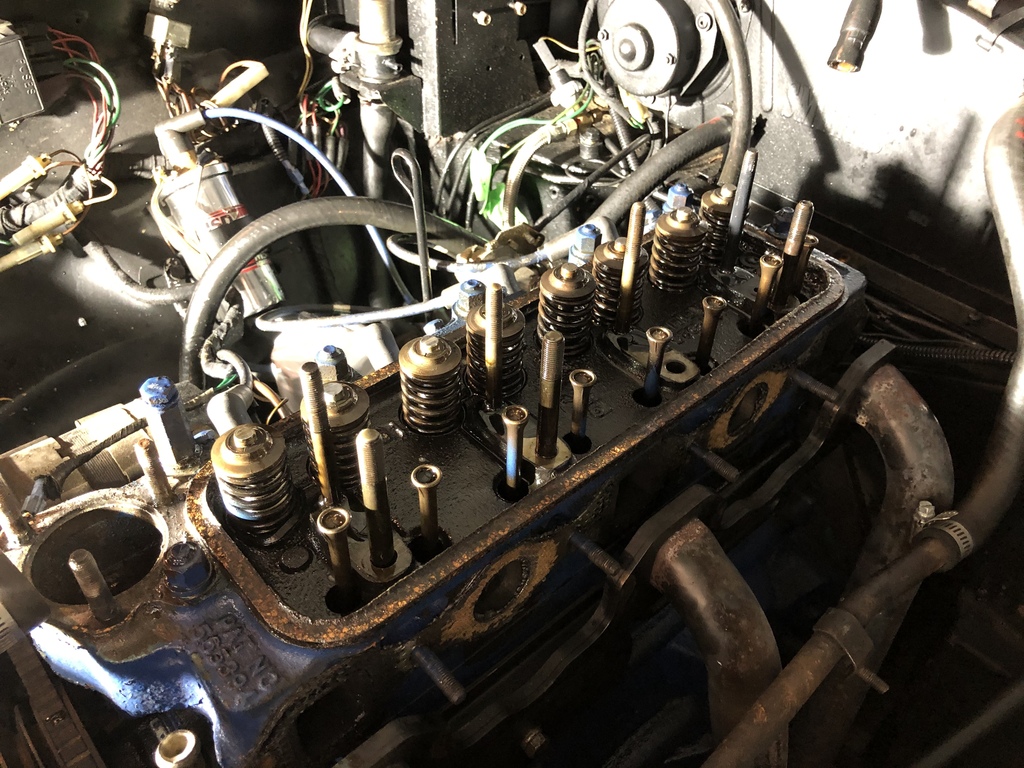
9. Remove rocker cover.
10. Remove rocker assembly
11. Remove pushrods (remember to mark which order they go in)
12. Remove head bolts.
13. Remove head (if you can...)
Sounds easy right? I'm missing some stuff...In fact there's a great video here on Youtube from David Russell-Wilks (this guy is pure class).
I was able to fairly easily get my head bolts out... All except one right between cylinder 2-3 on the spark plug side. According to the MG Experience forums this is not unusual. No amount of soaking it or tapping on it could get it out. I even tried the rope trick (putting a coil of rope down cylinders 1 and 4 and rocking the car until it pops... It didn't pop.)

I'm not sure where I found it but it seems that really, this stud was stuck in the head. The only way was to remove the head was to rotate the whole head around the stud and lift it off. There is room in the engine bay to do this but in order to do this more parts had to be removed.
1. Alternator
2. Water pump
3. lower the exhaust manifold even further
4. Front tappet cover
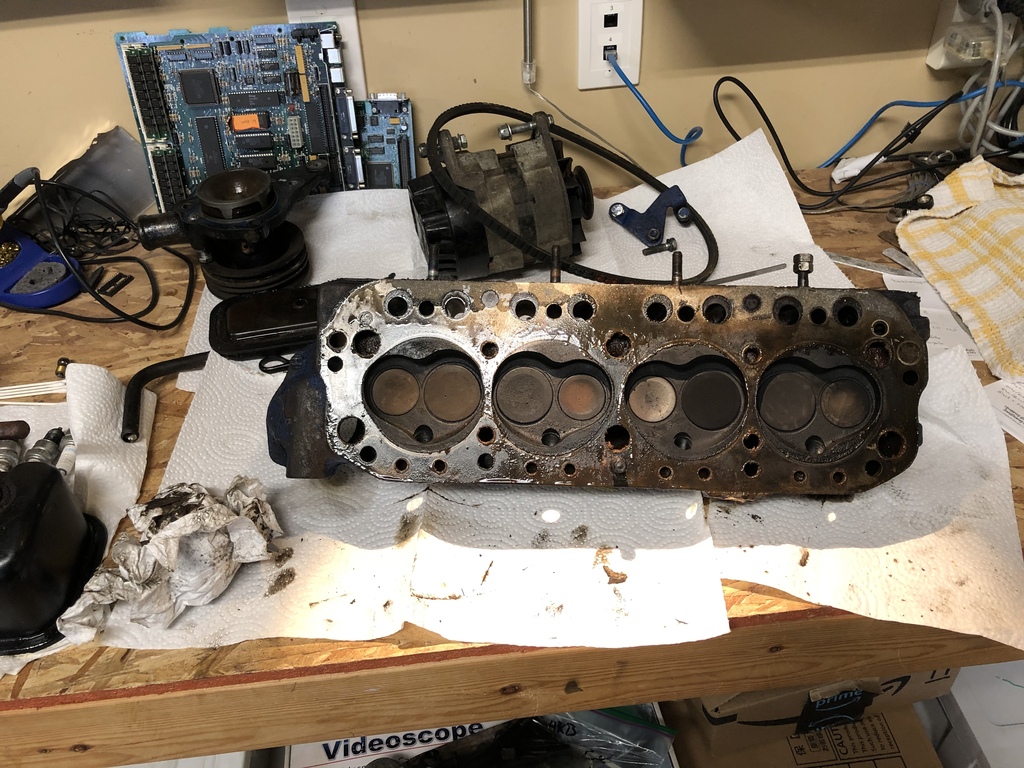
In the end I got it out. Sweet victory! I brought it to my bench to check it out, but low and behold, what nonsense is this? My head model is 12H2923. Lucy is a 1977 but this head was from between '72-74.
I investigated the engine stamp.... 18V658M-L11784. After more research this isn't even an MGB engine! It's an 18V engine but from an Austin Marina!
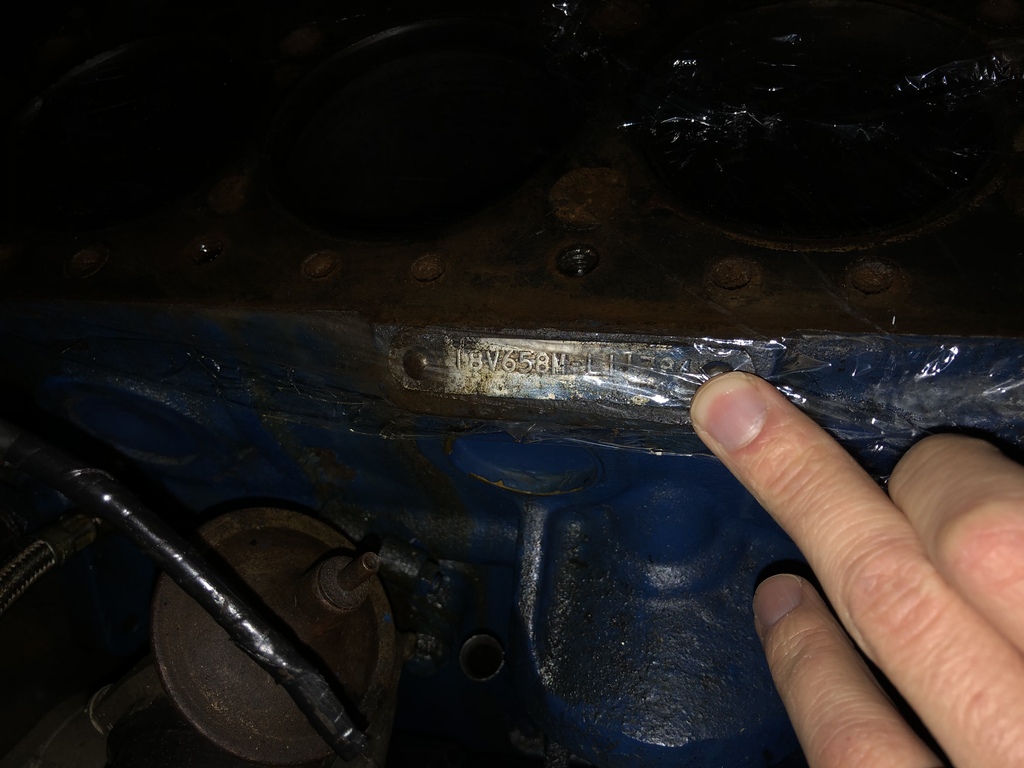
The Marina was a common engine to swap back in the day if you had a failing MGB model. Sigh... Well, on the upside the head and block is the same as Rusty which is a '74.5 MGB.
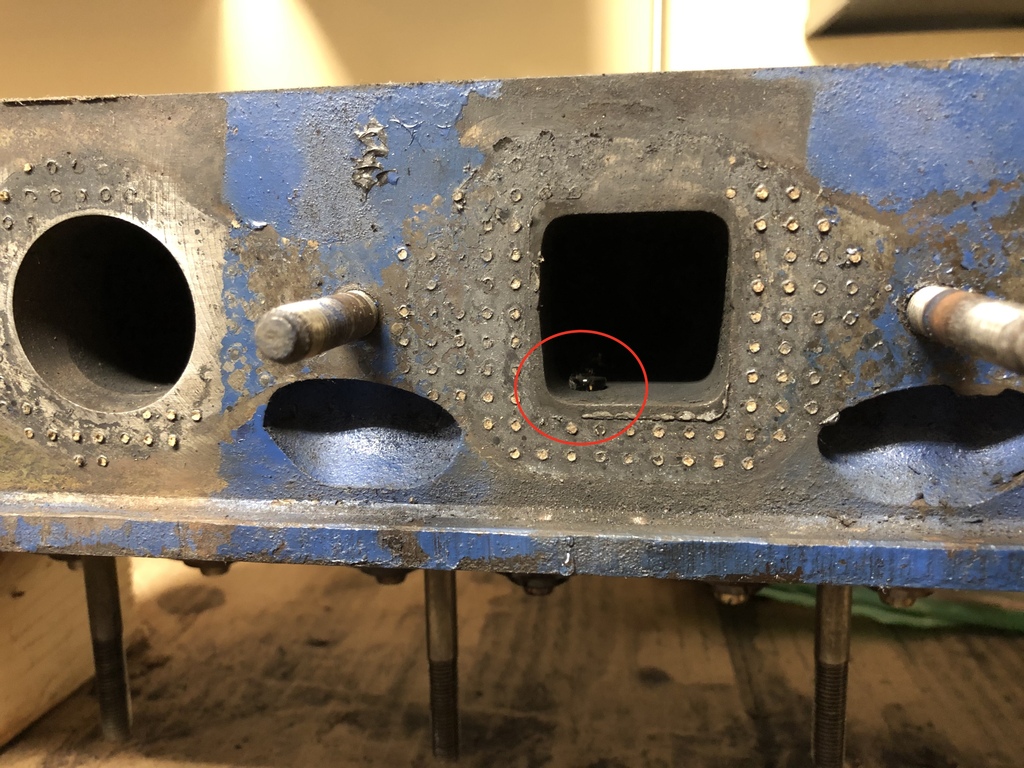
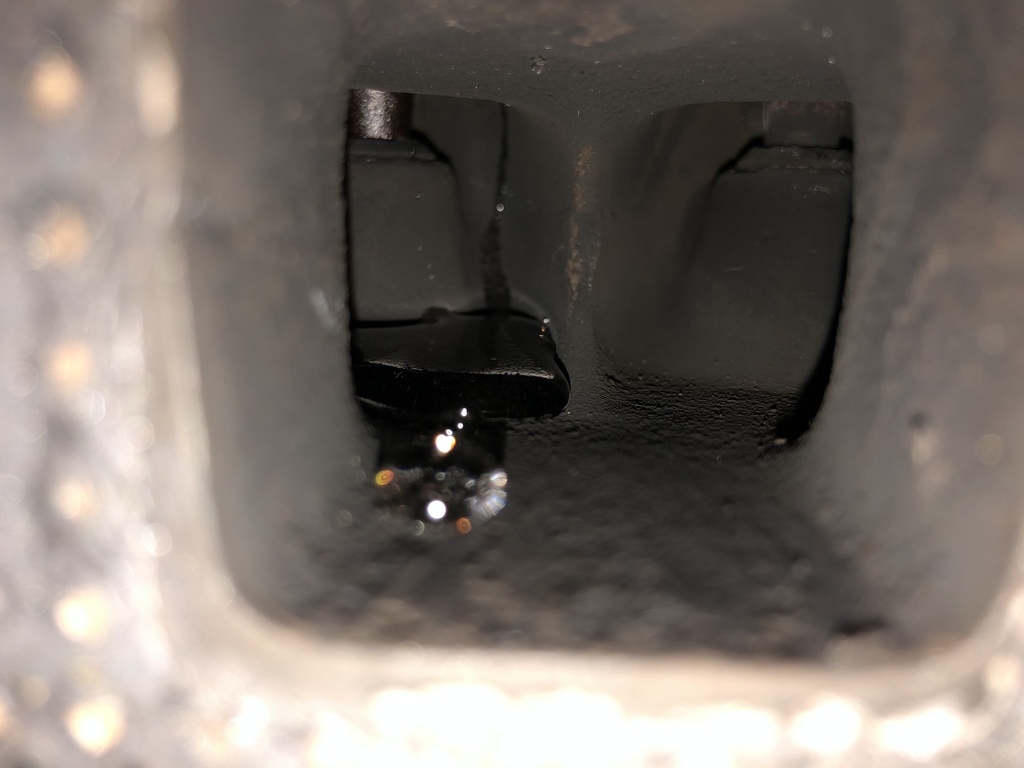
After having my friend at school remove the stuck stud with a torch I brought the head home and performed a leak test. Indeed, after a short time fluid was leaking through cylinder 3's exhaust valve into the head.
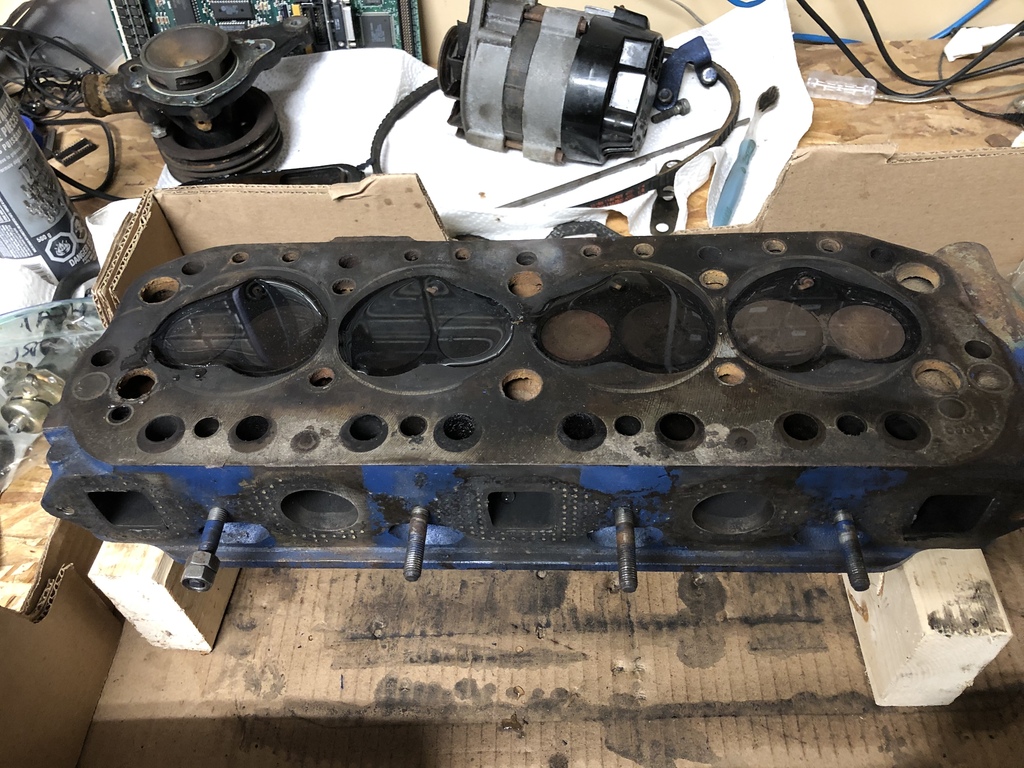
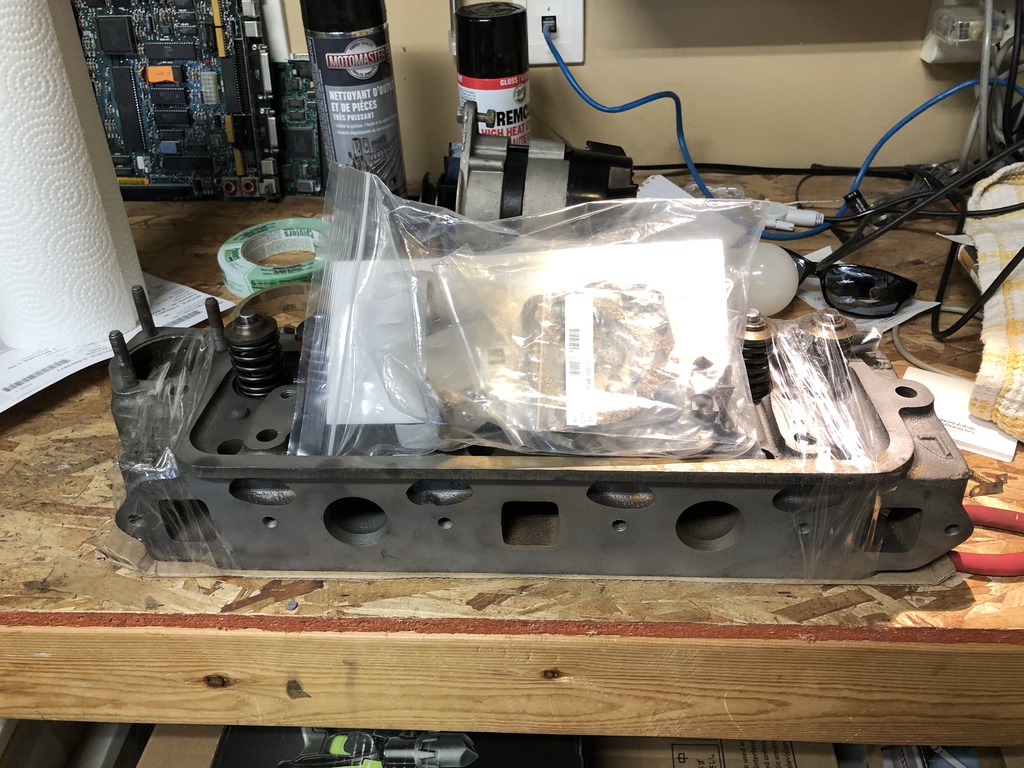
I brought it in to a local machine shop here to get it rebuilt and resurfaced. In the end I was told it would need a complete rebuild. More money and new valves, springs, guides later I finally got my head back shiny and clean!
I left it until the weekend and then excitedly took a look at my shiny new object, and immediately noticed a huge crack! What the heck! More searching exposed a second crack, and guess where both were located? Cylinder three.
Doing even more research yet again indicates that this head is junk. See the first crack type on Flowspeed's page here.
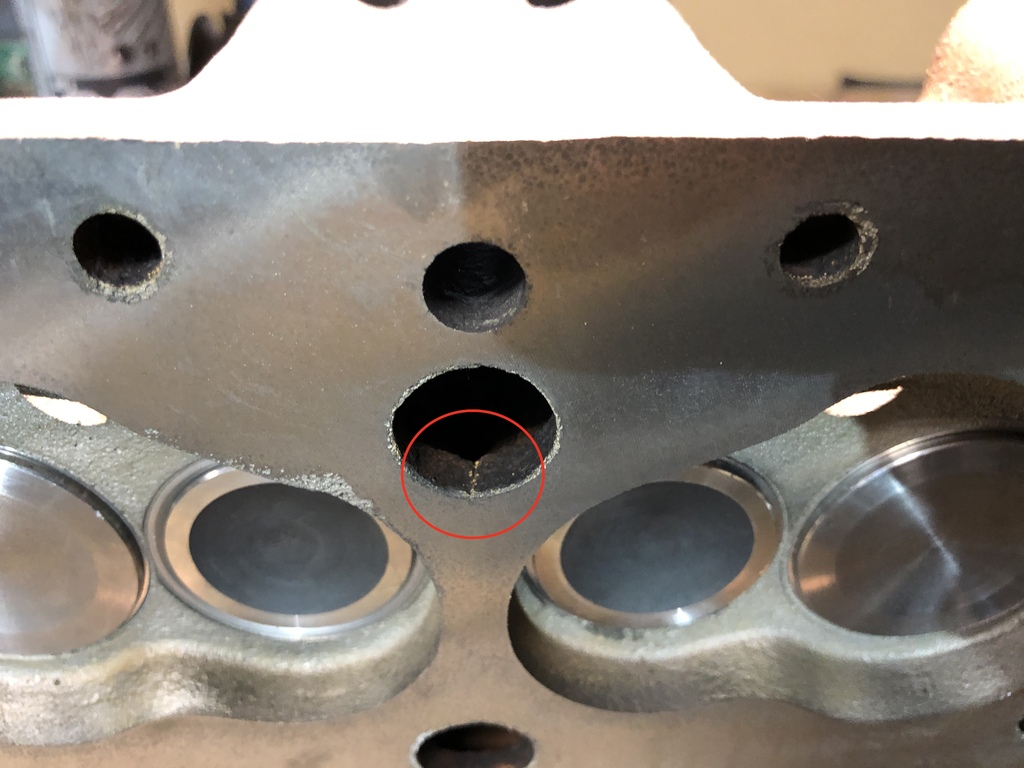

Guess this head really was losing pressure. My heart just sunk. I had spent a good chunk of change on this only to have net zero, ZERO outcome.
I slept fitfully overnight and sent an email to the shop as they were closed over the weekend. Blessedly I got a response back in a few hours. The head is now back in shop and they're finding me a new head at no charge.
So that's where I find myself now... Still in a holding pattern. To add to this adventure, due to COVID my new head studs from Moss Motors have been back ordered since early January.... Sigh... It's late March now.
Update!!!
Soo... Waited like a month with those people and then I realized, they had very little interest in finding me a head. I decided to take matters into my own hands and decided to go ahead and remove Rusty's head and get that one rebuilt for free.
Thankfully Rusty's head came off without any issue! No nasty stuck bolt, no blow torch required, no hammering at it with a wooden block. Just lifted right off. I excitedly brought back this head to the machine shop expecting to get it back in a week or two..... NOPE!
End of May I got frustrated having called every week after week three for an update on the progress. I finally announced that I was coming in on X date and picking it up completed. So that's what I did. Good riddance. I was tired of being lied to week after week. Six weeks later I finally had it back after bringing it in.
Well, from what I can see, Rusty's head cleaned up very nicely, no visible cracks and I will never return to that machine shop again. I just hope when I put the head back on it's all good to go.
Ironically, my studs from Moss arrived at my door within a day of getting my head back.
Last Updated: July 1, 2021