Some History
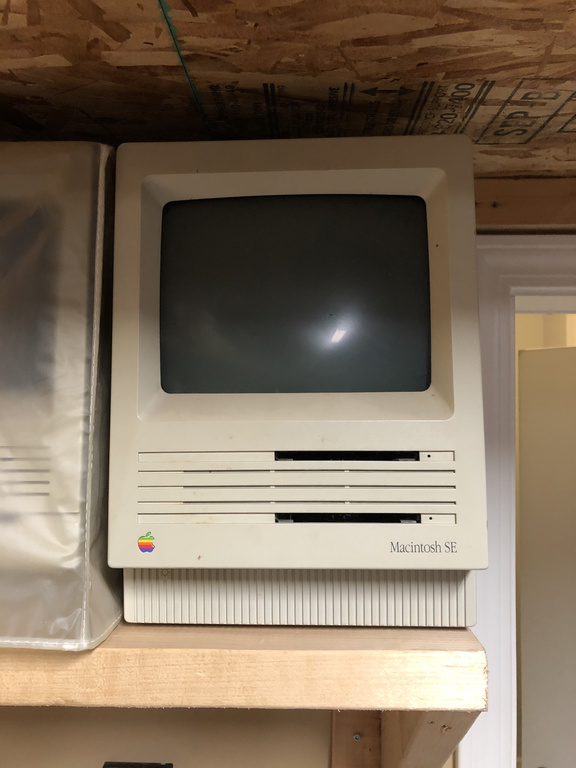
Over 11 years ago now I was given by a coworker this sad looking Mac SE. Apparently it had been acting as a door stop for many years and was now ready to be tossed. Confidently I claimed I could fix it but very quickly discovered it had a bad ROM chip and so over the years I made several attempts to fix it. My first attempt was to find a set of used ROMs on eBay. This proved a futile endeavour. Later I managed to create a new ROM (which I will describe below) but I couldn't figure out how to wire it in to the original ROM socket.
Fast forward to 2022 and I've had the sad motherboard staring at me on my work bench for the better part of 4 or five years. Lately since I've been working on Emmet the MGB I've been worried that the metal dust and grease and oil will ruin the motherboard for good. It was time to finish the project. And so I did!
Understanding the SE's ROM
There are a couple of different versions of the Macintosh SE's ROM. The original is from the SE proper which only supports 800K floppy drives. The newer version is from the SE FDHD which as its name implies supports floppy discs of high density (1.4MB). The later version ROM can be used on earlier SE models, suffice you also replace the IWM floppy controller with the later SWIM chip to support the higher capacity drives.
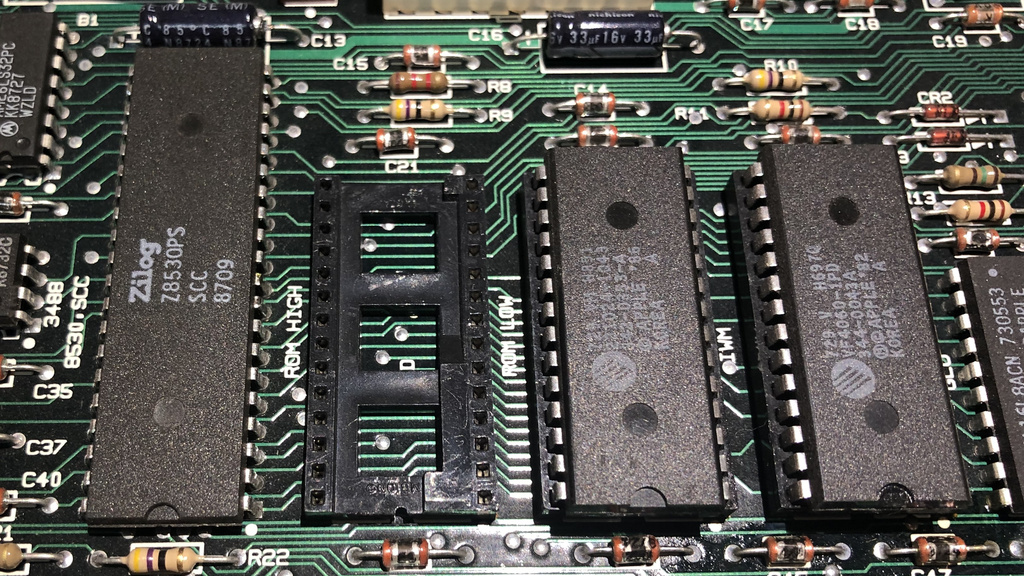
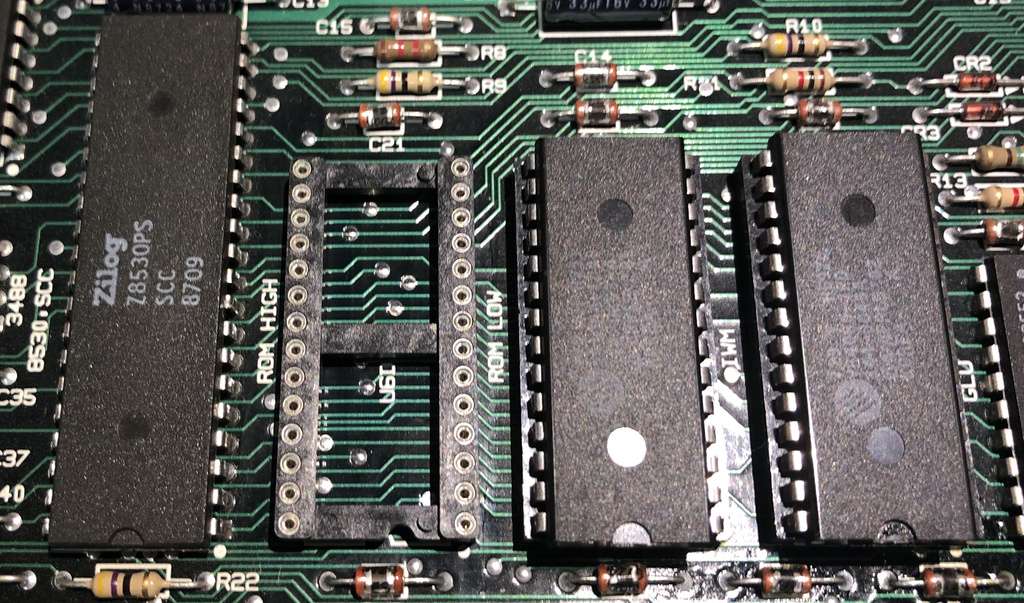
The SE uses two 128KB Mask ROMs similar (or identical?) to the Toshiba TC5310000AP series of chip. The pinouts are the same anyhow. They are labeled High ROM and Low ROM. This means that the bytes of the entire ROM are interleaved between two chips for a total of 256KB.
You can see what I mean below. The first image below is first few lines of the entire ROM image. The second is the High ROM only. Notice the B2 E3 62 A8 etc are the first words of the full ROM. Split, this turns into just B2 62 and so forth.


Upon boot, the Mac SE jumps to address $400000 and begins executing code. In my case, it error'd out and threw this message: F0000001.
According to this, it's now indicating that the ROM has failed its checksum... Therefore bad ROM.
But which ROM? This remains the question....
Splitting ROMs
Since at this point I don't have a good working ROM, I had to search for one on the interwebs. The Macintosh Repository has a nice download with a whole bunch of them including both SE ROM files.
The ROM of course needs to be split into two pieces. What to do! Well you can use your own dang solutions but I like PHP okay?!
Here's the code I used to split it... (Since this is a PHP page, add your own start and end php tags)
	$string = file_get_contents("MacSE.ROM");

	$ROMByteArray = str_split($string,1);

	$x=FALSE;
	foreach ($ROMByteArray as $string)
	{
		if ($x==FALSE)
		{
			echo "<br>";
			for($l=strlen($string), $i=0; $i<$l; $i++)
			{
				set_time_limit(120);

				//Hex Output
				print_r(bin2hex($string));
			}
			file_put_contents("MacSEHigh.ROM",$string,FILE_APPEND);
			$x=TRUE;
		}
		else
		{
			$x=FALSE;
		}
	}
ROMinatoring
Now that I have a High and Low ROM image, I can now determine which of my ROMs are bad. I have my trusty GQ-4X from MCUMall that I purchased a long while ago. Unfortunately it doesn't have any profiles for Mask ROMs native in the software. After some digging I determined that a 27C512 uses the same pinout except that it's missing the A16 (the highest address line). This will only allow me to read the first 64KB of each chip. Hopefully this will be enough.
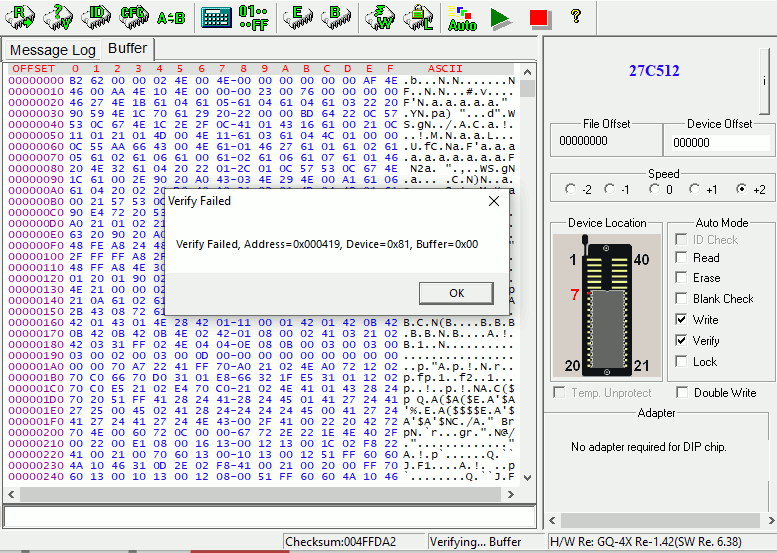
In my case it was! After loading the known good new split High ROM, I read the real High ROM chip using the Verify function on the software. Almost right away it determined that something was different at Hex 419 or address 100 0001 1001 in binary. Yup. Bad. So I know I need to program a new High ROM.
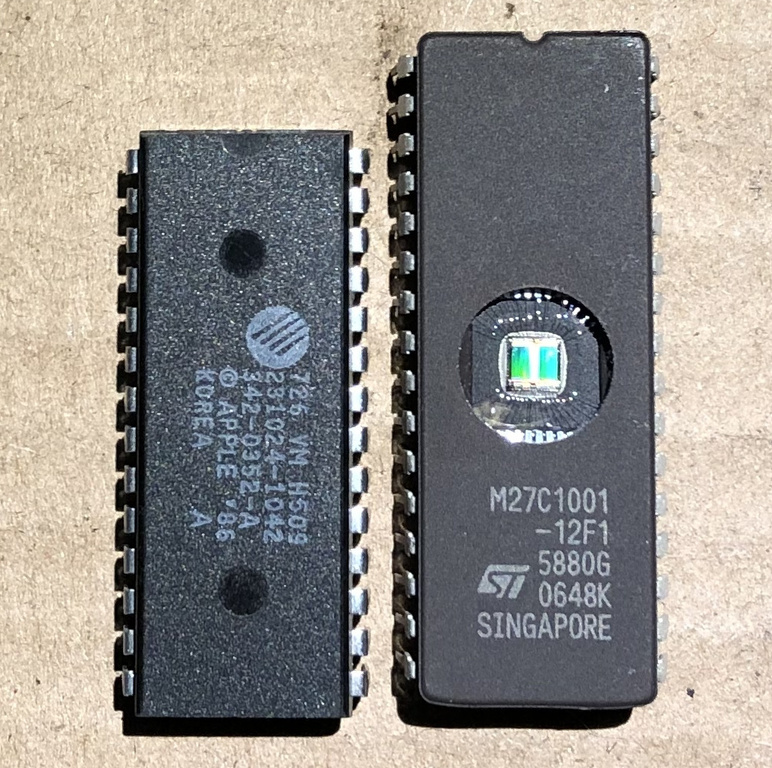
Well... I purchased a couple of 27C1001 128KB EPROMs from eBay as a replacement. Great... Burned the ROM. Now to stick it in the old socket and be done right? WRONG!! Unless you're using an identical Mask ROM the EPROM has not only a slightly different pinout but also has 32 pins, not 28!
Thankfully though the 27C1001 is not a ton different from the Mask ROM. According to the schematic there are just a few things to reconfigure.
Modifying the EPROM
1. Carefully bend straight the top four pins of the ROM or VPP, A16, /P and VCC (1,2,31 and 32)
2. Carefully bend straight /G (pin 24)
4. Solder a wire between VSS (pin16) and /G (pin 24) to hold output enable low.
5. Bridge /P and VCC (31 and 32) and find a 5V connection on the motherboard (I used the high side of R27 as seen). Solder a wire to this point and connect it to VCC (pin 32).
6. Solder a wire to A16 (pin 2) and route this to the ROM socket pin directly beneath /G (pin24). Be careful not to short pin 24 on the ROM to A16 in the socket.
7. Socket the chip back in the ROM socket. Done!
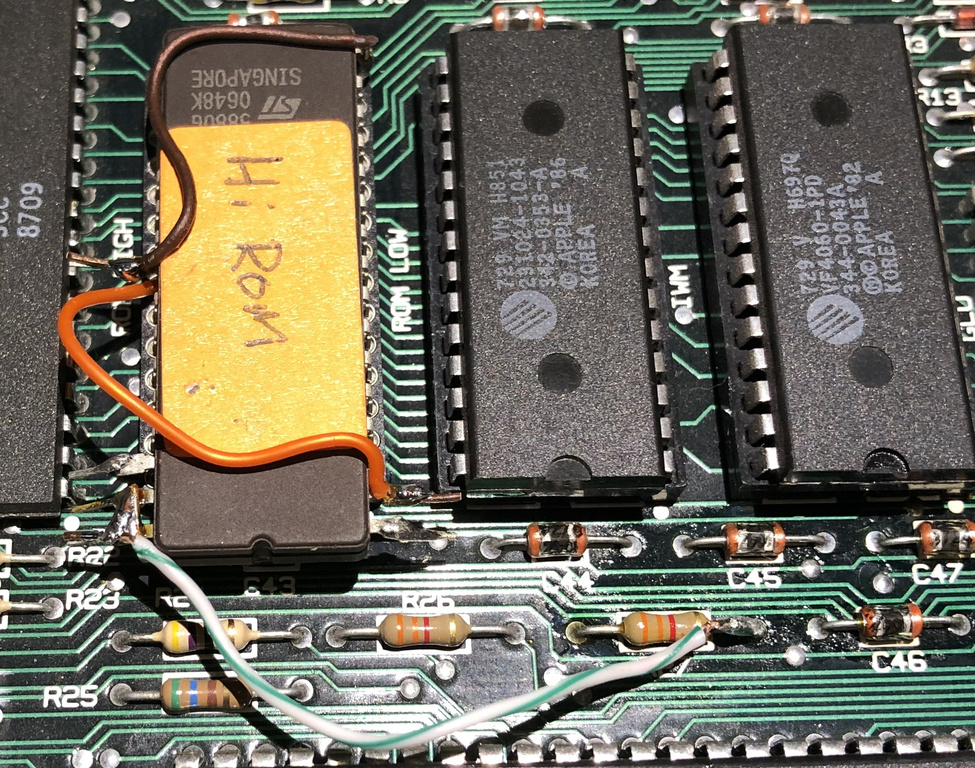
In addition to this I also had to put in a new socket for my ROM as I damaged the original one with one of my earlier attempts at repair. The old socket is on the left. I had damaged the pins internally so they weren't getting a good connection to the chip. I upgraded to a better quality socket.
Here's the full board ready to go!

Last but not least, I still have the original clock battery in this thing. It's a Varta and check it out, made in West Germany! Wow, it's as if the Cold War never ended. On this board the battery is not socketed, so it has to be clipped off and replaced with something else in the future. I'm frankly shocked this thing hasn't leaked its guts all over the place by now like I've seen on some other newer machines.

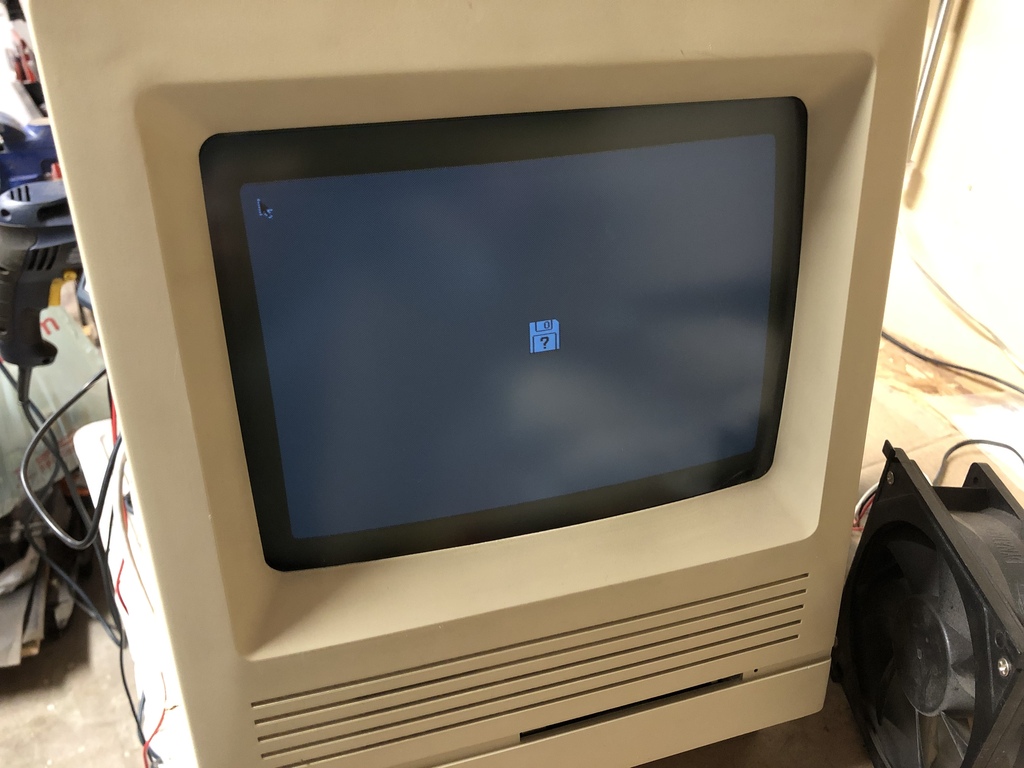
Well at this point you're done! Fire up yer Mac and away you go! After 11 years sweet victory!
Links
Sad Mac Codes
Macintosh Repository - All Macintosh ROMs
Files
TC531000AP Mask ROM Datasheet (PDF)
M27C1001 EPROM Datasheet (PDF)
Mac SE ROM Schematic (GIF)
1989-08 - B306E171 Mac SE FDHD (Full .ROM)
1987-03 - B2E362A8 - Mac SE (Full .ROM)
1987-03 High ROM (.ROM)
1987-03 Low ROM (.ROM)
Last Updated: May 3, 2022