I've been a Aruba network guy for nearly a decade now and I've never quite been happy with the captive portal for our guest WiFi network at work. I visited another school and my friend there has scripted his Ubiquiti WiFi on his guest wifi to have a rotating WPA2 key that is printed on a nifty sheet of paper that can be given to a guest upon his/her arrival. I loved this idea and decided to bake my own with my Aruba gear. So here goes...
Tools Required:
-Aruba Instant Network running 8.9.0 firmware or later
-Some sort of computer running Linux (Debian 11 in my case) with the following installed:
php8.2 (or later)
cups
php-curl
-Arduino Pro Micro
-Some sort of SPST Button
-A 1KOhm resistor
-Some hookup wire
-Soldering Iron
-Access to a 3D printer or a small project box to put stuff in
-A cheap thermal receipt printer
Enabling the API And Scripting The Change
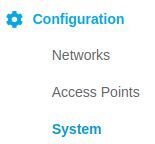
K, first things, we've got to enable terminal access so that we can enable the API. Soo.... Head over to your Aruba Instant login, browse down to configuration and in the right column click advanced at the bottom. From here you can enable terminal access. SSH into your IAP controller from here.
Here we go... Enable the API using the following commands (after the hash).
Aruba Instant AP# config
Aruba Instant AP (config) # allow-rest-api
Aruba Instant AP (config) # end
Aruba Instant AP (config) # commit apply
Now that we done, we can proceed to writing a script that will change the WPA passphrase on our Guest network.
<?php

$controllerIP = "192.168.x.x";
$SSID = "GuestNetwork";
$username = "YourArubaUsername";
$password = "YourArubaPassword";
$file = "passphrase.txt"; // The name of the file we want to write to

//I got ChatGPT to make this array for me so I could save time not typing it myself.
//You can use whatever array of things you wish of course...
$bible_books = array(
    "Genesis",
    "Exodus",
    "Leviticus",
    "Numbers",
    "Deuteronomy"
);

$random_key = array_rand($bible_books);
$random_value = $bible_books[$random_key];
//Choose a random number between 1000 and 2000 to append to first part of passkey
$random_number = rand(1000, 2000);
//Generate message to print out for our guest
//The escape r escape n sequence pads out new lines so that we have some space below and above the text we print.
$newPassText = "\r\n\r\n" . $SSID . " passphrase for today is: \r\n" . $random_value . $random_number . "\r\n\r\n\r\n\r\n\r\n";
//Generate our new WPA passphrase
$newPass = $random_value . $random_number;

//Login to the AP and get a SID for further communications
$loginURL = "https://". $controllerIP .":4343/rest/login";
$query = '{"user":"'.$username.'","passwd":"'.$password.'"}';
$json = curlRequest($loginURL,$query);
$sid = $json->sid;

//Set the SSID Passphrase
$ssidURL = "https://". $controllerIP .":4343/rest/ssid?sid=". $sid;
$changeWPA = '{"ssid-profile":{"action":"create","ssid-profile":"'.$SSID .'","wpa-passphrase":"'.$newPass.'"}}';
$json = curlRequest($ssidURL,$changeWPA);

//Dump new passphrase to a text file so we can pick it up by another script.
if($json->message == "Success")
{
	echo $newPass;
	file_put_contents($file, $newPassText);
}

//Function for cURL
function curlRequest($url,$jsonText){
  $ch = curl_init();
  curl_setopt($ch, CURLOPT_SSL_VERIFYPEER, false);//Aruba Instant uses a self signed cert so we need this
  curl_setopt($ch, CURLOPT_SSL_VERIFYHOST, false);//and this.
  curl_setopt($ch, CURLOPT_URL, $url);
  curl_setopt($ch, CURLOPT_HTTPHEADER, array('Content-type: application/json'));//tell it that we're sending JSON
  curl_setopt($ch, CURLOPT_POSTFIELDS, $jsonText);
  curl_setopt($ch, CURLOPT_RETURNTRANSFER, true); //Make sure it returns to us as something useful.
  $result = curl_exec($ch);
  curl_close($ch);
  return(json_decode($result));
  }
?>
Basically what happens is that we first generate a new passphrase, in my case I am using an array of all the books of the bible (in the code example above I'm only using the Pentateuch), randomly choosing one of them and then appending a number between 1000 and 2000 (just because).
Next make an API login request to our Aruba controller and retrieve the SID that is returned upon successful authentication.
Finally, we send a request to change the passphrase on the SSID we defined at the top of the script. All of this and more can be programmed using the attached document from Aruba attached in the link at the bottom of this page.
Oh but I forgot... On a successful password change we will write a little message to passphrase.txt that we can print later on.
Great! So we have a script that will change our code for use. After this I can execute this in a cron job and we can have the passphrase refresh on a daily, monthly, whatever cycle.
0 0 * * 0 php /home/user/wifichanger.php
Printing
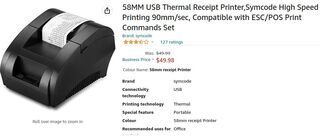
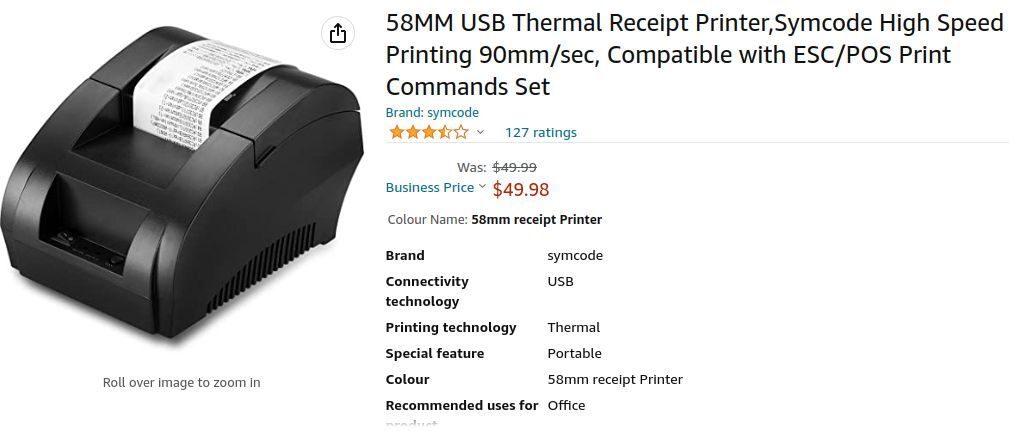
This is the next step, the nifty piece of paper we can give to a visiting guest. I went online and bought the cheapest possible thermal printer I could find. Probably not a great idea in retrospect. Here's what I purchased below:
It's a text only printer that can print 32 characters in width. Perfect for my application, has USB, there was a review that says it has a Linux driver. Perfect... Except, not really.
I set up cups and then shared the config page so I could access it remotely to manage the printer more easily when fiddling with the setup.
From here I can log into cups from my main desktop by browsing to the host ip with port 631.
After setting up the printer, I could easily send test prints but I soon discovered that printing anything from the command line using the lp command I could issue once, then I'd have to physically restart the print in order to get it to print a second time! Annoying!
After two days fiddling with it I discovered that this wasn't actually my fault, it's a known issue with cheap Chinese printers using a certain firmware (Zijiang). In order to fix, I needed to add a line to the cups USB quirks file located at /usr/share/cups/usb
I ran dmesg to get the USB ID (which was 0416:5011) and then added the following line:
0x0416 0x5011 unidir soft-reset
Now I can issue a command to print out my text file. In my case I created a little ASCII logo to print first followed by the passphrase text file.
lp -d thermal logo.txt passphrase.txt
The Button
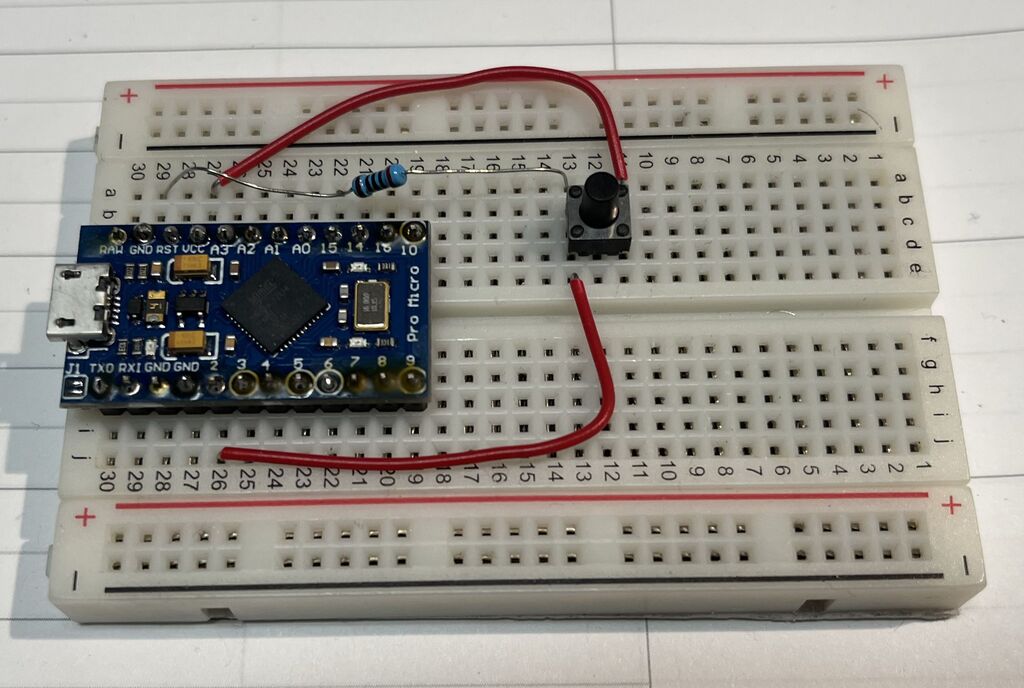
Now that printing is sorted out I set out to create the button that will issue the command. An Arduino Leonardo or Arduino Pro Micro (not Mini Pro) can use the keyboard library and act as a keyboard. I hooked up a SPST button to pin two and created this code to run when the button is pressed:
#include
#include

void setup()
{
 Keyboard.begin();  // Initialise the library.
}

// Loop around waiting for a button press on pin 2.
// When the button is pressed, go to the function triggerAutomation.
void loop()
{
  if(digitalRead(2) == HIGH)
  {
    triggerAutomation();
  }
}

void triggerAutomation()
{
  Keyboard.print("user"); //type the username
  Keyboard.press(KEY_RETURN);//press the enter key
  delay(100);//wait for the computer to see that the key has been pressed
  Keyboard.releaseAll();
  Keyboard.print("password"); //type the password
  Keyboard.press(KEY_RETURN);
  delay(100);
  Keyboard.releaseAll();
  delay(1000);
  Keyboard.print("lp -d thermal logo.txt passphrase.txt"); // Print the stuff
  Keyboard.press(KEY_RETURN);
  delay(100);
  Keyboard.releaseAll();
  delay(5000);//wait some time to let the print job finish
  Keyboard.print("logout"); //log out of the server
  Keyboard.press(KEY_RETURN);
  delay(100);
  Keyboard.releaseAll();
}
Here is the prototype circuit I built to test my setup.
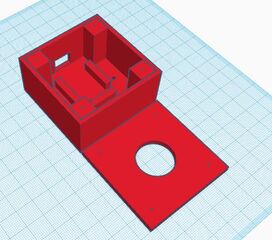
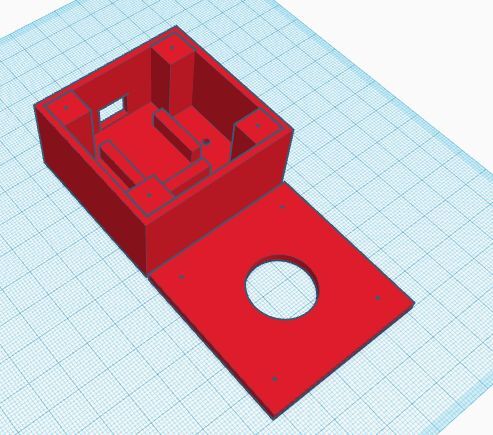
I built a box on TinkerCAD to stick everything in with a hole at the top to fit a 22mm button I also found that's got a satisfying click.
Done! Now a single button press and our rotating guest password is ready to be put into use!
What I Might do Different...
Ideally it would be nice to stick everything in one box. If I could figure out different drivers for this cheap printer I may switch everything over to a Raspberry PI Zero. This way I could use one of the GPIO pins for my trigger button and have the server, button and printer all in one tidy box. As it stands this is was a more practical solution as I had a ultra small form factor PC on hand for my linux box and an Arduino was cheaper than a Raspberry Pi. If I go the Raspberry Pi route, I will post an update.