History
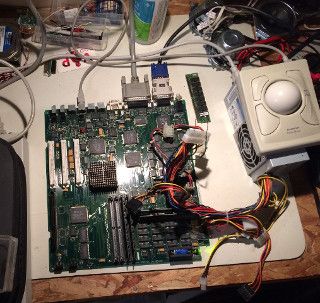
I wanted another colour Macintosh to mess around with, preferably with a 68040 processor so I managed to pick up a Centris 650 motherboard off of eBay for $20 including shipping. I already had a couple spare server SCSI 9.1GB Seagate HDDs and an auto-eject floppy but no case or power supply. I figured I could hack myself together a case (and I do mean hack, I'm a terrible wood worker) and derive some power from an ATX power supply like I've done in the past on my SE/30 and iMac DV.
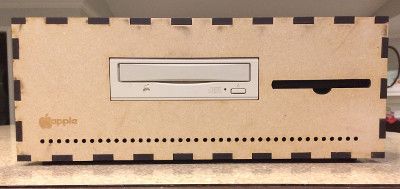
Update!: My case design has improved. We're borrowing a laser cutter at work and I've modelled myself a new case in TinkerCAD.
Selecting The Right ATX PSU
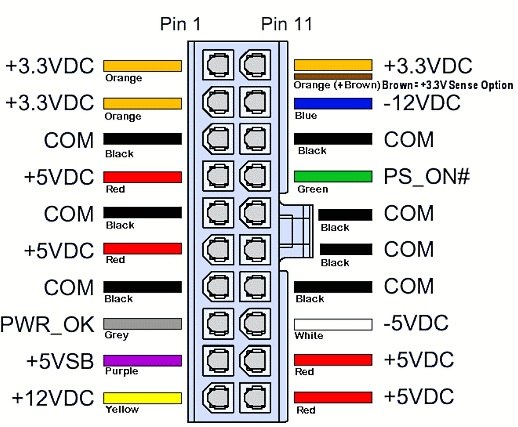
It shouldn't be too hard but it is important to find a PSU with the proper power outputs. After digging around on Google I found a couple pictures of a IIVX PSU which is pin compatible. Actually this hack will work on any of the Macs in the title above.
V1 = +5V 1mAV1 will be the trickle voltage for the soft-power on button on ADB or the button on the rear of the motherboard. The first small form factor PSU I found did not have sufficient amperage on the -12V, but fortunately the second one I found from a Core 2 Duo machine had 0.8A output on the -12V so we've got 200mA to spare.
V2 = +5V 15A
V3 = -12V 0.6A
V4 = +12V 2.5A
Pinouts
|
|
|
Connections
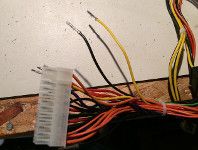
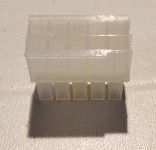
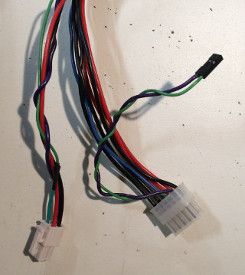 I wanted to make this project a little neater than in the past. Previously I've nicked off the old cable from the dead PSU and soldered it to to an ATX header I've pulled off a dead ATX based motherboard. No such option this time as I didn't have an old PSU to pull from. This time I removed the plastic molex header from an ATX PSU and trimmed it down to the 10 pins that actually have the same hole pattern as the original PSU (Pin 1-5, 11-15), from there I manually remove the appropriate wires from the ATX supply and re-inserted them into my new male PSU connector. But.....
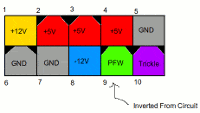
Of course Apple does things a little different. Just like with my iMac DV, through a Reddit thread I discovered that these Mac's need the soft-power line pulled HIGH (+5V) instead of LOW (GND) like an ATX requires. In this case again we'll need to use an inverter or transistor to pull this off. Thank goodness we have that trickle 5V to pull this off.
Building the Connector
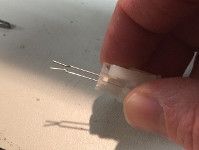
To get the wires disconnected from the plastic housing on an ATX molex connector you'll need two staples. These are thin and strong enough to push aside the retaining clips on either edge of the metal insert. Straighten them out and push them in on either side of the connector between the housing and the metal. Needle nose pliers are a good way to get them in there nice and snug. You should be able to push them down a good way before hitting something at the bottom. A good way to see if you're hitting the right spot is if both staples are inserted the same depth.
Once this is done you should be able to pull the cable straight out of the housing, ready to be re-inserted when you're ready according to the Centris 650 power connector and 4-pin breakout diagrams above.
The finished product is on the right. As you can see, one caveat are the green and purple wires which are not connected to an ATX line but instead connected to a DuPont female header.
This is because these two signals will derive from the output of our circuit below as the green is our power on line which needs to be inverted before going to the Centris and purple is the trickle power we need for both the inverting circuit and the Centris motherboard.
Building the Circuit
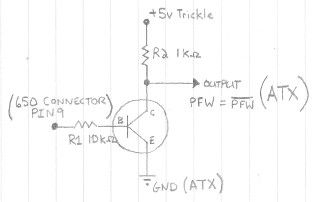
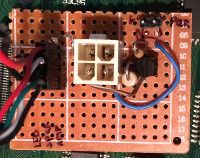 There you go. This is the circuit required to get you up and running. Basically we run the soft power on from the Centris, IIci whatever (active high), into a small NPN transistor on the base which is then used as a switch to pull the power low on the ATX supply. To accomplish this I've taken a 12V connector from an ATX motherboard and repinned the male connection for my Trickle 5V, PFW and GND. The fourth pin in my circuit is a regular 5V line that I'm using with a resistor and LED strip for my Power On ground effects which can be seen in the photo at the top of this page.

