
My Collection
Hardware Projects
Software Projects
Arduino
MGB
Misc
Fancy Version (Modern Browsers)
68K Web Browsing
Improved 68K Browsing with Squid: Part 1 & 2
Improved 68K Browsing With Squid: Part 3
Image Testing on old Macs - JPG vs GIF
68K SSH
68K Mac and a NAS
68K Mac TCP/IP over Serial
68K Macintosh and a Modern Printer
68K Macintosh and IMAP Email
Podcasts on 68K Macintosh
68K Macintosh Video on the Web
Scripting Guest WiFi Changes on Aruba Instant
Scripting Guest WiFi Changes on Aruba Instant Part II
Integrating Blackbaud FENXT with Google Sheets
Weekly Room Calendar Viewer
Home > 68KBrowsingSquid
Improving 68K Macintosh Browsing With Squid
Introduction
Back in 2013 I wrote a little thingy on browsing with a SE/30. With recent developments in security and the push by Google and many others towards encryption and pushing sites to be full https we encounter a number of issues on our venerable hardware. For one, encryption adds significant overhead to processor usage and an increase in page load times. In addition we now live in the age of Heartbleed and POODLE which have broken SSL3, and so most if not all smart sites no longer support SSL3 connections. This is not even to mention the now obsolete RC4 and MD5 encryption ciphers which have serious vulnerabilities.
I hardly need mention that the most modern browsers for 68K were made over a decade ago the most modern of which is iCab 2.99 which was released sometime in the mid-2000's. My favorite is Netscape 4.0.8 while Internet Explorer 4 is an option as well as Wannabe and Lynx fill out the text only ranks.
With most sites going away from HTTP and SSL3 in favour of TLS many browsers can't even attempt to begin loading pages as they have no common language anymore to speak, not that they rendered well on the modern web anyhow. (I mean hey, we all knew this day was coming).
So, as with all things 68K, I had to find a way to hack it, so at least we had some common language, and heck if we can help out our old browsers a bit with cleaning up pages before they arrive, all the better!
My Setup
Server:
VirtualBox VM
1 Processor
1 GB RAM
8 GB HDD image
Debian 9.3.0
|
Target Machine:
Macintosh Centris 650
25MHz 68040
108MB RAM (2x16MB, 2x32MB and 8MB onboard RAM)
9GB 7200RPM Seagate SCSI HDD
Mac OS 8.1
|
This page will be split into two parts. Part 1 will deal with compiling Squid and OpenSSL for SSL Bump and SSL3 support respectively. Part 2 will deal with the Macintosh end of things.
Part 1
Working at a school I'm quite familiar with content filtering to keep the youth of this generation on the straight and narrow, one tool in our arsenal is Squid. Squid is an internet proxy that also has a nifty feature called SSL Bump. This allows the proxy to intercept SSL or TLS connections and modify the connection before it allows it to pass to the client. This is what is known as a Man in the Middle exploit and it's becoming increasingly hard to make work in the days of new methods to mitigate this kind of exploit (much to the chagrin of this parent and IT person).
For our purposes we're going to take that incoming hyper-secure TLS connection with some fancy high cipher encryption and present a new certificate to the client with a weak cipher and a SSL3 connection that will be compatible with Internet Explorer 4.
The reason I've chosen IE4 is because I was not able to get Netscape 4.0.8 happy with certificate. iCab would have been my second choice but it only offers a proxy for http connections.
So here goes....
Installing and Compiling OpenSSL with SSL3 and Weak Ciphers
I'm assuming you know how to install a base install of Debian on a VM or real machine and give it a static IP on your local network.
K... For some reason this doesn't work to build with a root user, so might as well do it as a normal user.
1. Grabbest some build tools
# Get build tools
apt-get -y install devscripts build-essential fakeroot debhelper dh-autoreconf cdbs
2. Buildest a directory
#my home directory is as follows... Use your own username
mkdir /home/username/opensslbuild
cd /home/username/opensslbuild
3. Grabbest the code
apt-get source openssl
4. Open the rules file
nano openssl-1.1.0f/debian/rules
5. Modify the rules file to include the following flags on the CONFARGS line. Yes I've enabled SSL2 as well for compatibility.
enable-ssl3 enable-ssl3-method enable-ssl2 enable-weak-ssl-ciphers
6. Build the package
#Change directory
cd /home/username/opensslbuild/openssl-1.1.0f
#Build package
dpkg-buildpackage
7. What you'll get now is a bunch of deb and udeb files in your directory. You can now install them by issuing the following...
dpkg --install libssl1.1_1.1.0f-3+deb9u1_amd64.deb
dpkg --install libssl1.1-dbgsym_1.1.0f-3_deb9u1_amd64.deb
dpkg --install libssl-dev_1.1.0f-3+deb9u1_amd64.deb
dpkg --install libssl-doc_1.1.0f-3+deb9u1_all.deb
dpkg --install openssl1_1.1.0f-3+deb9u1_amd64.deb
dpkg --install openssl-dbgsym_1.1.0f-3+deb9u1_amd64.deb
8. Prevent openssl and libssl-dev from updating
apt-mark hold openssl libssl-dev
Installing and Compiling Squid with SSL Bump
1. First some prerequisites (all run as root user cuz this works differently for some reason... Or I just don't know something which is totally possible):
#Make build directory
mkdir /root/squidbuild
cd /root/squidbuild

# Get build dependences for squid
apt-get -y build-dep libecap
apt-get -y build-dep squid3
apt-get install libdbi-perl
2. Grab source:
#Get Squid Source
apt-get source squid
3. Modify build rules file:
#Open rules file
nano squid3-3.5.23/debian/rules
4. Add the following lines under DEB_CONFIGURE_EXTRA_FLAGS
--with-openssl \
--enable-ssl \
--enable-ssl-crtd
5. Build the code!
#Change Directory
cd /root/squidbuild/squid3-3.5.23
#Build it
dpkg-buildpackage -rfakeroot -b
6. Deb files will appear again after the build procedure. Install those nuggets.
dpkg --install squid3-3.5.23-5_all.deb
dpkg --install squid_3.5.23-5_amd64.deb
dpkg --install squid-cgi_3.5.23-5_amd64.deb
dpkg --install squidclient_3.5.23-5_amd64.deb
dpkg --install squid-common_3.5.23-5_all.deb
Configuring Squid for a Basic Connection
1. Build a directory to store your SSL Certificate
cd /etc/squid
mkdir ssl_cert
chown proxy:proxy ssl_cert
chmod 700 ssl_cert
cd ssl_cert
2. Build a weak certificate for interception
cd /etc/squid/ssl_cert

#Yes it's a 10 year certificate
openssl req -newkey RSA:512 -MD5 -days 36500 -nodes -x509 -keyout myCA.pem -out myCA.pem

#This is used if you need a certificate to import into the users browser
openssl x509 -in myCA.pem -outform DER -out myCA.der
3. Modify the /etc/squid/squid.conf file
#	WELCOME TO SQUID 3.5.23
#	----------------------------
#

acl Safe_ports port 443		# https
#acl SSL_ports port 443
acl Safe_ports port 80		# http
acl Safe_ports port 21		# ftp
acl Safe_ports port 443		# https
acl Safe_ports port 70		# gopher
acl Safe_ports port 210		# wais
acl Safe_ports port 1025-65535	# unregistered ports
acl Safe_ports port 280		# http-mgmt
acl Safe_ports port 488		# gss-http
acl Safe_ports port 591		# filemaker
acl Safe_ports port 777		# multiling http
acl CONNECT method CONNECT

# Deny requests to certain unsafe ports
http_access deny !Safe_ports

# Deny CONNECT to other than secure SSL ports
#http_access deny CONNECT !SSL_ports

# Only allow cachemgr access from localhost
#Enter your own subnet of course...
acl localnet src 192.168.1.0/255.255.255.0
http_access allow localnet
http_access allow localhost manager
http_access deny manager

#http_access allow localnet
http_access allow localhost

# And finally deny all other access to this proxy
http_access deny all

# Squid normally listens to port 3128
http_port 3128 ssl-bump \
 cert=/etc/squid/ssl_cert/myCA.pem \
 generate-host-certificates=on dynamic_cert_mem_cache_size=4MB

sslcrtd_program /usr/lib/squid3/ssl_crtd -s /var/spool/squid3_ssldb -M 4MB

acl step1 at_step SslBump1

ssl_bump peek step1
ssl_bump bump all

# Leave coredumps in the first cache dir
coredump_dir /var/spool/squid


# Add any of your own refresh_pattern entries above these.
#
refresh_pattern ^ftp:		1440	20%	10080
refresh_pattern ^gopher:	1440	0%	1440
refresh_pattern -i (/cgi-bin/|\?) 0	0%	0
refresh_pattern .		0	20%	4320
4. Initialize Certificate DB
ln -s /usr/lib/squid3/ssl_crtd /bin/ssl_crtd
	/bin/ssl_crtd -c -s /var/spool/squid3_ssldb
chown-R proxy:proxy /var/spool/squid3_ssldb
5. Prevent Aptitude from updating our custom squid
apt-mark hold squid3 squid3-common
Configuring iptables
We need to configure rules to allow our client to pass its traffic through this server:
1. Write some rules
2. <your_eth> can be found by running the ip address command on your server to determine your ethernet card alias. Mine is eth0.
iptables -t nat -A PREROUTING -i <your_eth> -p tcp --dport 80 -j REDIRECT --to-ports 3128
iptables -t nat -A PREROUTING -i <your_eth> -p tcp -m tcp --dport 443 -j REDIRECT --to-ports 3128
3. install iptables-persistent. This will preserve the rules between reboots. We've placed the rules in first as iptables-persistent will generate its config off of the current rules.
apt-get install iptables-persistent
From here you should now reboot your server and test your config so far... reboot now
Part 2
Internet Explorer 4
 After some testing between IE 4.0.1 and Netscape 4.0.8 I've had better success with IE 4. First, it seems to render pages more faithfully and secondly I can't for the life of me get Netscape to work for me even with Squid bumping on. My major issues with IE however are that it crashes fairly regularly (taking OS 8.1 with it) and it doesn't render PNG images unlike Netscape.
The PNG issue can be overcome and we can tweak some other things to help it behave better as I'll show below... The PNG fixing will come a bit later in another page I think.
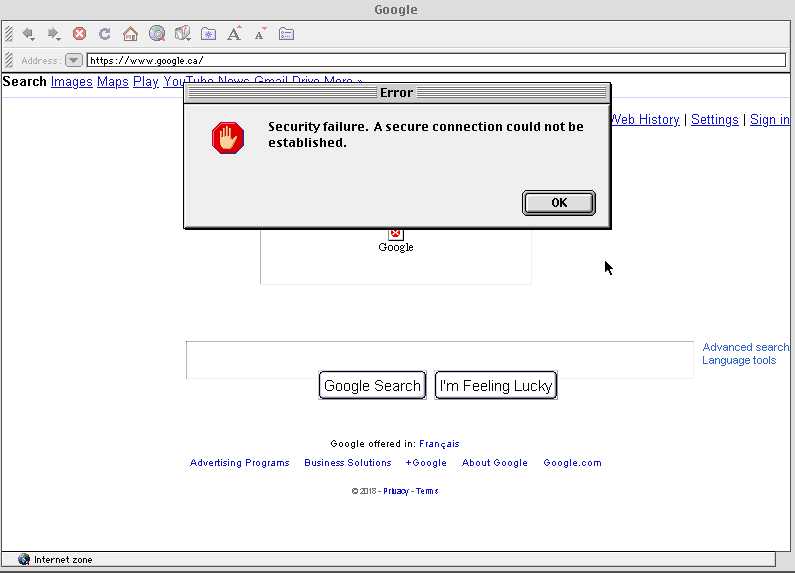
By default this is what we get browsing to Google without a proxy or anything configured.

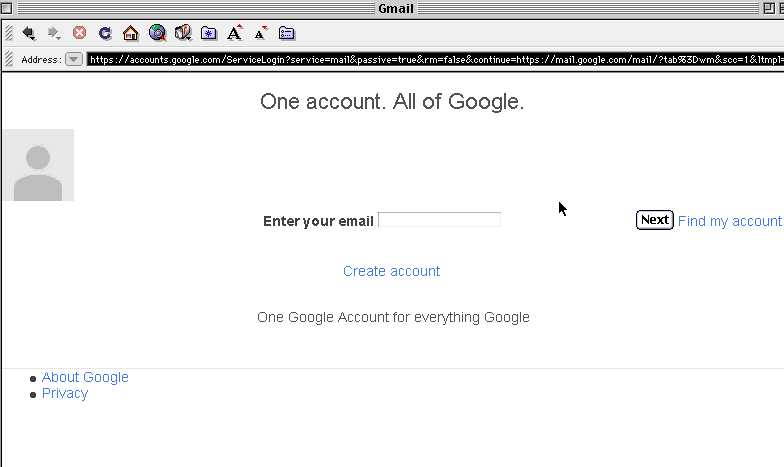
Oh... don't even try getting into an https configured page.... Here I am trying google as a https. No common protocol.
Let's tweak the settings in IE a bit...
1. Go to Edit - Preferences...
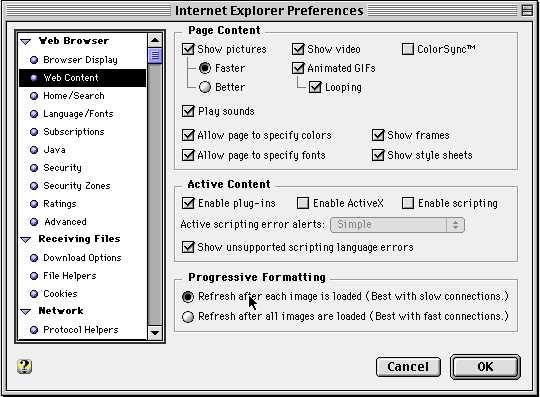
2. Turn off scripting. It just gets messy when ancient Javascript engines try to do something like load a page. Best to turn it off
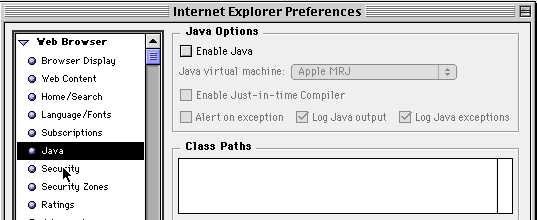
3. Also Java.... Who knows what that would try to do. Disable it.
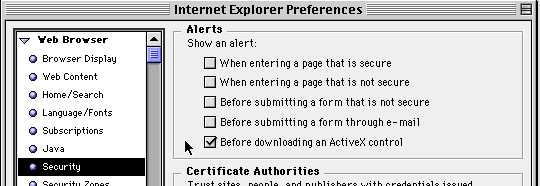
4. I also hate getting a whole bunch of messages when we change zones. We can disable those settings too.
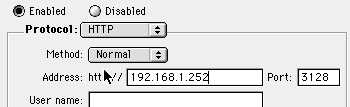
5. Next lets configure the proxy. You can configure yours using the settings I have below but using your own server IP. Notice I'm putting in the default port for Squid for both Normal and Secure settings just like we put in our IP Tables above.
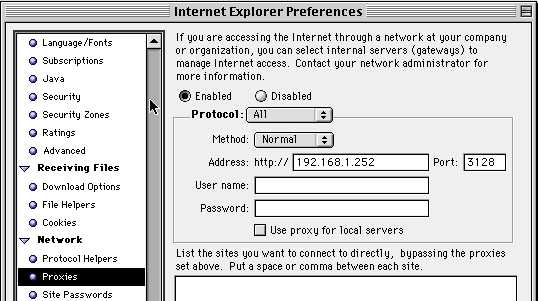
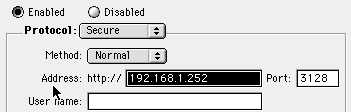
Be careful... I've noticed that sometimes my settings for the secure proxy spontaneously revert to tunnel for some reason. Make sure this remains normal
6. Let's try it now... K... Not really sure what exactly this means, does it mean that there is no installed root certificate for our server? Does it mean the server is sending stuff in clear text? I'll have to dig into this further with some packet sniffing later. But it says continue... who cares. Click past it.
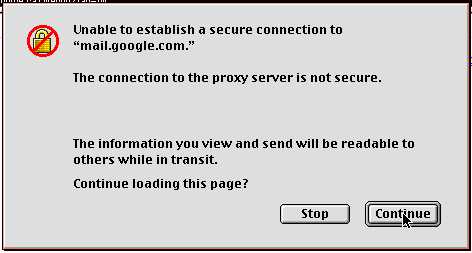
Voila! Look at that, common protocol, and now we're back in!
Stay tuned for Part 3. There I will explain how to pretty up pages by using squid to compress images and other content modifications.
PART 3!!! >>
Links
Intercept HTTPS CONNECT messages with SSL-Bump
OpensSSL Compilation and Installation (Build flags)
Downloads
Internet Explorer 4.01 (SIT)
Last Updated: November 10, 2018