DMX Controlled LED Bamboo/Coral for Tarzan and Little Mermaid
Overview
My workplace has performed plays and musicals from the very beginning of its high school program. Last year the students performed Tarzan and this year (2026) will be Little Mermaid.
for the last five years I've been asked to come up with various props that involve electonics as it's something I'm obviously interested in. Therefore I was tasked with building some bamboo to provide stage effects. I decided to make it compatible with a DMX lighting control board, and so I set out to build a bunch. This year the props were dusted off again, repainted and turned into coral. I'll be improving a few things this year to enhance the effects.
Supplies
Bamboo/Coral
3" PVC Pipe
RGB light strips (12V). Can be RGB for two different colour options or RGBI if you like just a single
CAT5 or better network cable
CAT5 or better keystone jacks. (Two for each coral bundle)
2-Port Plastic Keystone Wallplate
Bolts and Nuts (to hold the assembly together)
Paint
Amber Shellac (Bamboo only)
DMX Connections
CAT5 or better network cabling
CAT5 or better keystones
CAT5 or better patch cables
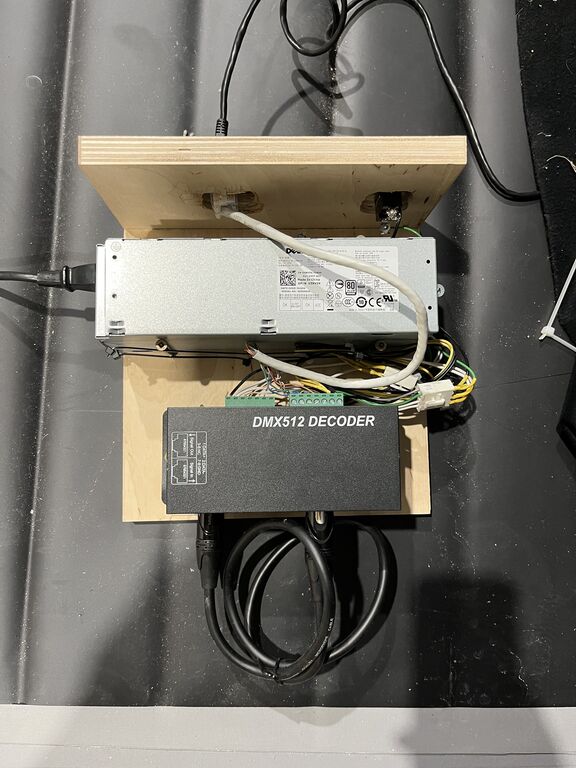
12V PSU (I used an old Dell desktop PSU)
SPST Switch
2 - 4 Channel LED DMX Decoders (Super cheap on Amazon)
Testing
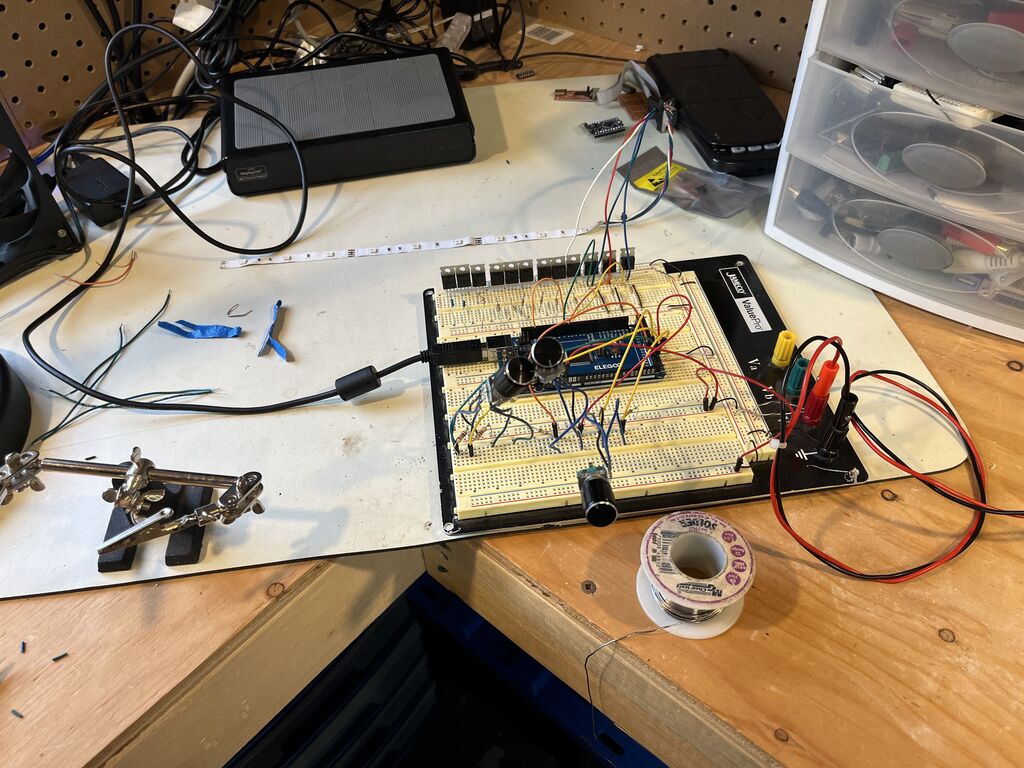
Arduino (Uno, Mega, whatever)
360 Rotary controller (one for each color R, G and B)
IRLZ44N N-Channel MOSFET Transistors (again, one for each color value)
Resistors (10KΩ and 220Ω)
Hookup wire
Breadboard
First Tests
I wanted to see if LED strips in PVC would actually work. I cut a length of 9 LEDs and tested them in a piece of 4 inch PVC I had obtained from our facilities department. Our theatre director liked the concept so it's on to step two.
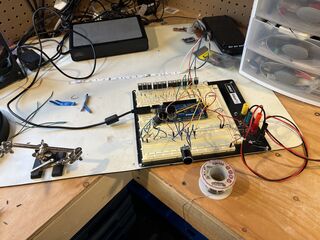
I needed a test setup to quickly test and verify my bamboo. I setup an Arduino with some MOSFETs and rotary switches. This gave me the ability to individually control the light level of each channel so I could especially test the circuitry on each bamboo bundle. The picture below is slightly misleading as it appears I have 9 MOSFETs on the breadboard. Rest assured I'm only using three as can be seen in the chase test video below. If you need a decent tutorial on Arduino and MOSFETs there's a pretty good guide here on Instructables.
Below is the code I used with my Arduino Mega to test the bamboo. I did run it through Gemini to clean it up before uploading it here to optimize it.
/*
 * RGB Encoder Control
 * Cleaned version: Removed LCD, implemented function-based logic
 */

// Encoder Pins
#define R_OUT_A 52
#define R_OUT_B 53
#define G_OUT_A 50
#define G_OUT_B 51
#define B_OUT_A 48
#define B_OUT_B 49

// LED Pins (Must be PWM pins)
#define RED_LED    3
#define RED_LED2   5
#define GREEN_LED  4
#define GREEN_LED2 6
#define BLUE_LED   2
#define BLUE_LED2  7

// Global variables for tracking state
int rCount = 0, gCount = 0, bCount = 0;
int rLast, gLast, bLast;

void setup() {
  Serial.begin(9600);

  // Initialize Pins
  int inputPins[] = {R_OUT_A, R_OUT_B, G_OUT_A, G_OUT_B, B_OUT_A, B_OUT_B};
  for(int i = 0; i < 6; i++) pinMode(inputPins[i], INPUT);

  int outputPins[] = {RED_LED, RED_LED2, GREEN_LED, GREEN_LED2, BLUE_LED, BLUE_LED2};
  for(int i = 0; i < 6; i++) pinMode(outputPins[i], OUTPUT);

  // Initial state reads
  rLast = digitalRead(R_OUT_A);
  gLast = digitalRead(G_OUT_A);
  bLast = digitalRead(B_OUT_A);

  Serial.println("System Ready. Rotate encoders to change colors.");
}

void loop() {
  // Update each color using the helper function
  updateEncoder(R_OUT_A, R_OUT_B, rLast, rCount, RED_LED, RED_LED2, "Red");
  updateEncoder(G_OUT_A, G_OUT_B, gLast, gCount, GREEN_LED, GREEN_LED2, "Green");
  updateEncoder(B_OUT_A, B_OUT_B, bLast, bCount, BLUE_LED, BLUE_LED2, "Blue");
}

/**
 * Helper function to handle encoder rotation and LED PWM output
 */
void updateEncoder(int pinA, int pinB, int &lastState, int &counter, int led1, int led2, String label) {
  int currentState = digitalRead(pinA);

  if (currentState != lastState) {
    // Determine direction
    if (digitalRead(pinB) != currentState) {
      if (counter < 255) counter++;
    } else {
      if (counter > 0) counter--;
    }

    // Update LEDs
    analogWrite(led1, counter);
    analogWrite(led2, counter);

    // Update Serial Monitor
    Serial.print(label + " Position: ");
    Serial.println(counter);
  }

  lastState = currentState;
}
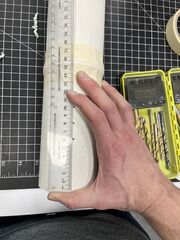
PVC Construction
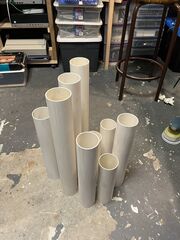
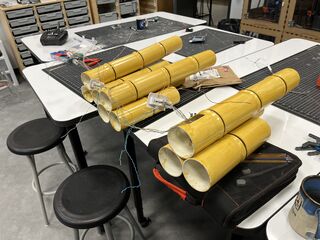
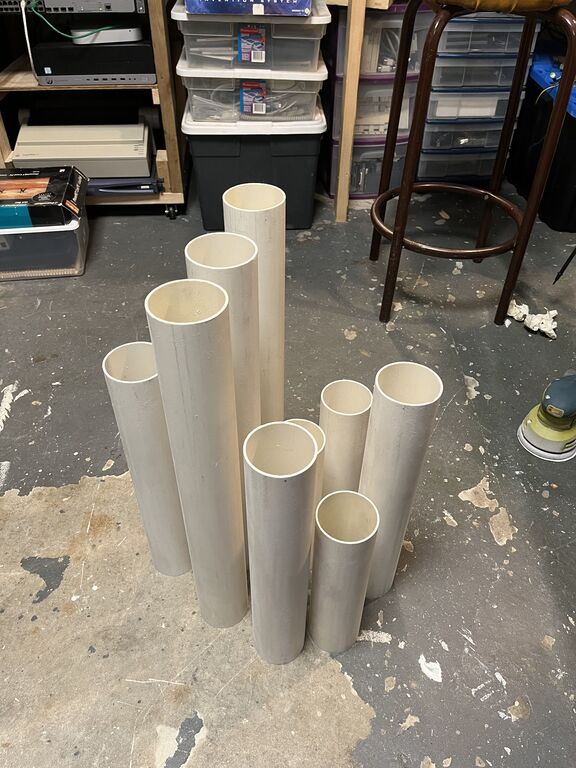
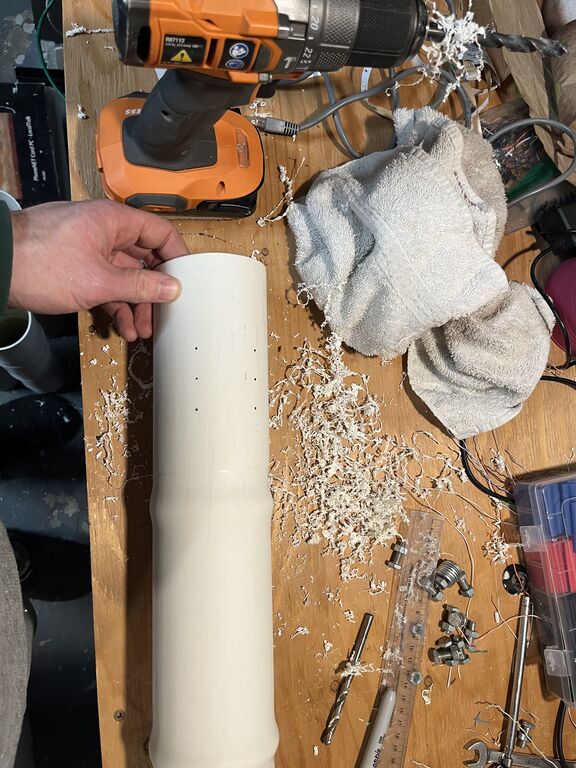
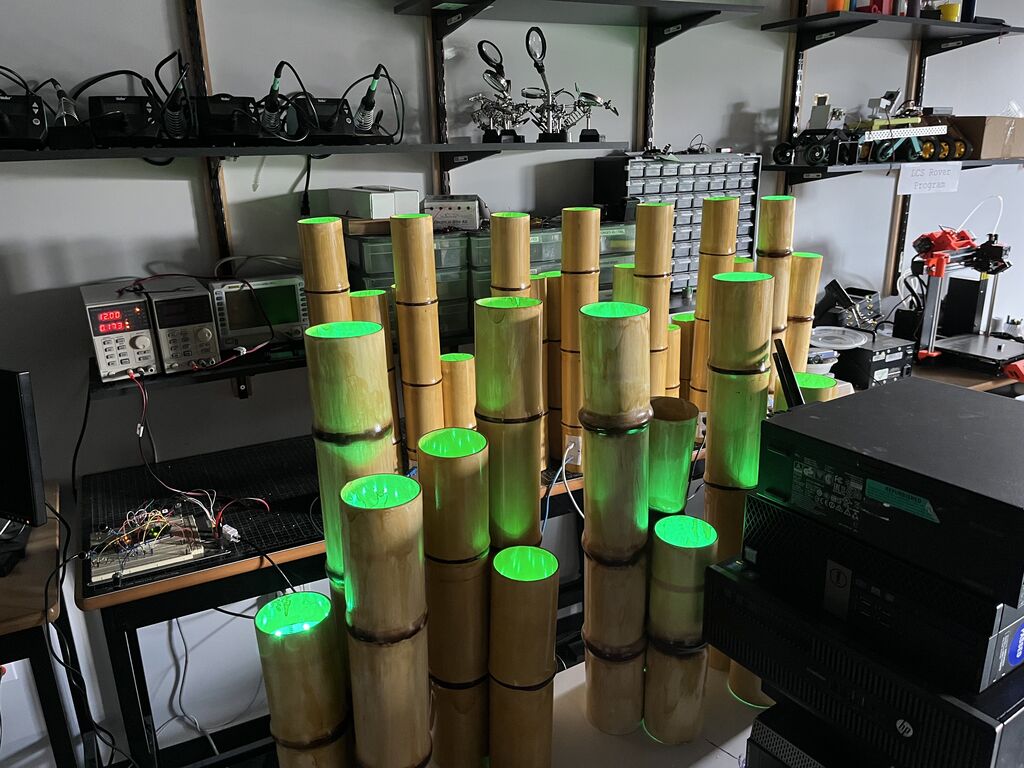
I chose to build bundles of three bamboo bolted together using, well, nuts and bolts. 3" PVC allowed me to fit my hand and work with my tools inside the interior. I chose three lengths, 2ft, 1.5ft and 1ft and after my first test bundle, I ended up using a chop saw with a finishing blade to cut all my sections to length. I built 14 bamboo bundles in total, so there was 42 sections total, or 63ft of PVC used.
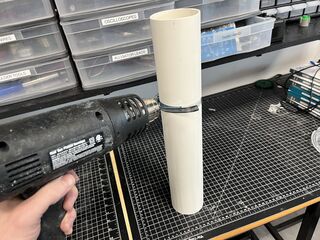
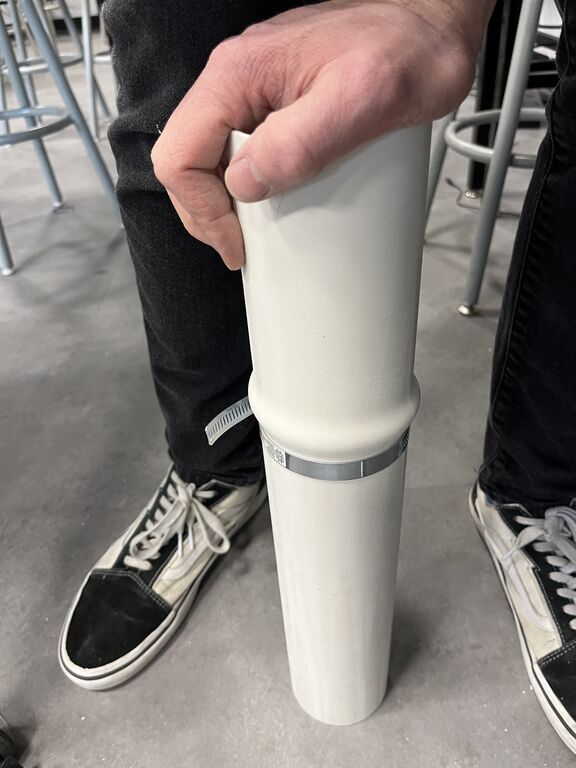
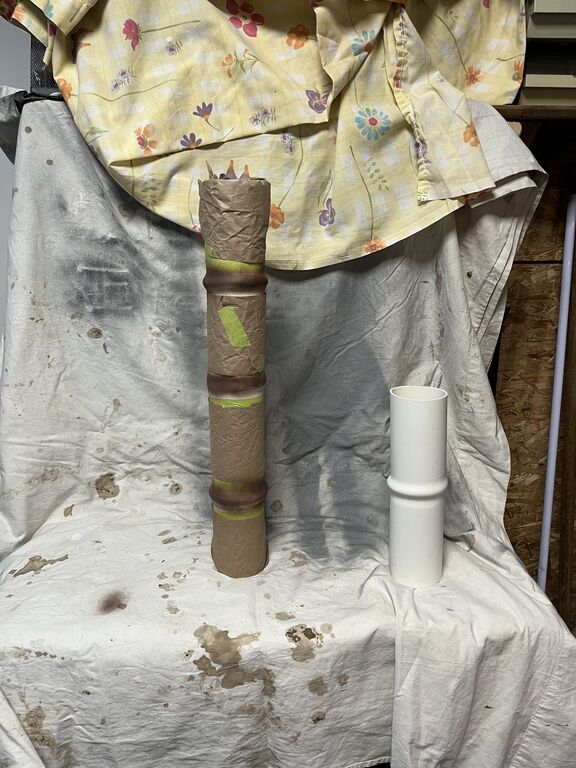
After this I needed to shape the bamboo and give it the distinctive nodes that make it special. This bamboo is seen from at least 10ft away so it doesn't have to be perfect. To make the nodes, I first tightened a band clamp around the area I was forming, then I applied heat from a heat gun to soften the area around the band clamp.
Finally, I pushed down firmly on top of the PVC against the ground, causing the softened area to bulge around the band clamp, holding it there until it cooled into a fixed position (like a minute or so). Tada! Bamboo.
Holes needed to be drilled for joining the pieces together, along with vias for pulling wire to a central place in order to terminate them together. This was done at this stage so that the paint wouldn't be ruined after the fact.
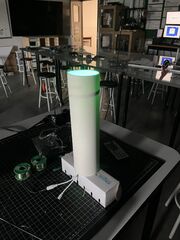
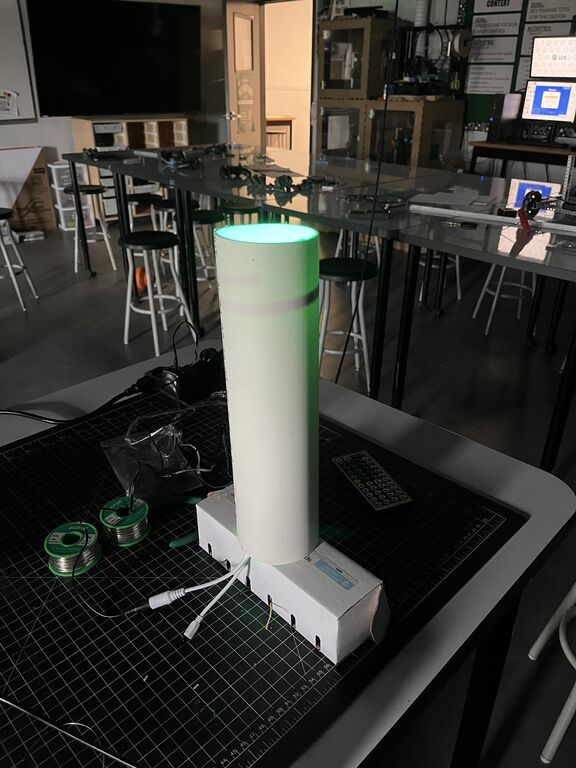
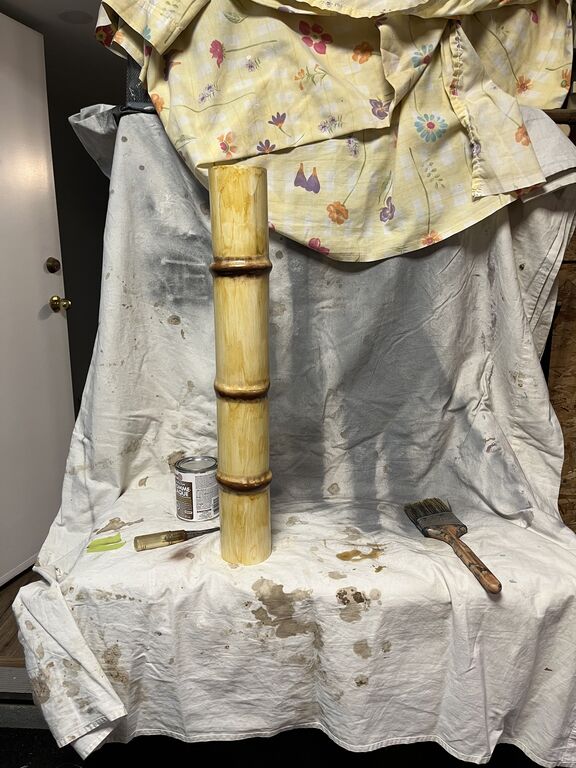
Next the sections needed painting, I first taped off all the node sections and spray painted them. Once dry, I sanded the edges to soften the edges. After this, I used amber Shellac with a rough brush to give the surface a wooden texture. From 10ft away, it looks like bamboo!
Wiring
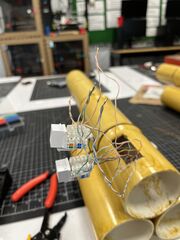
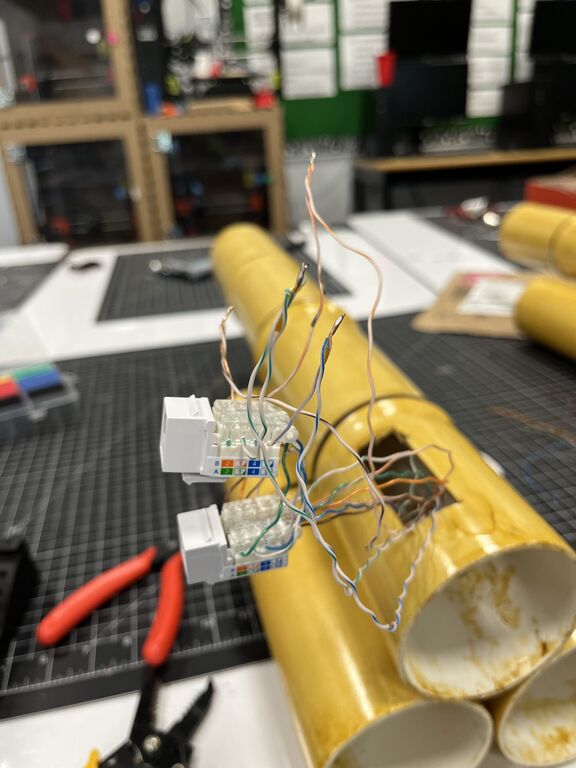
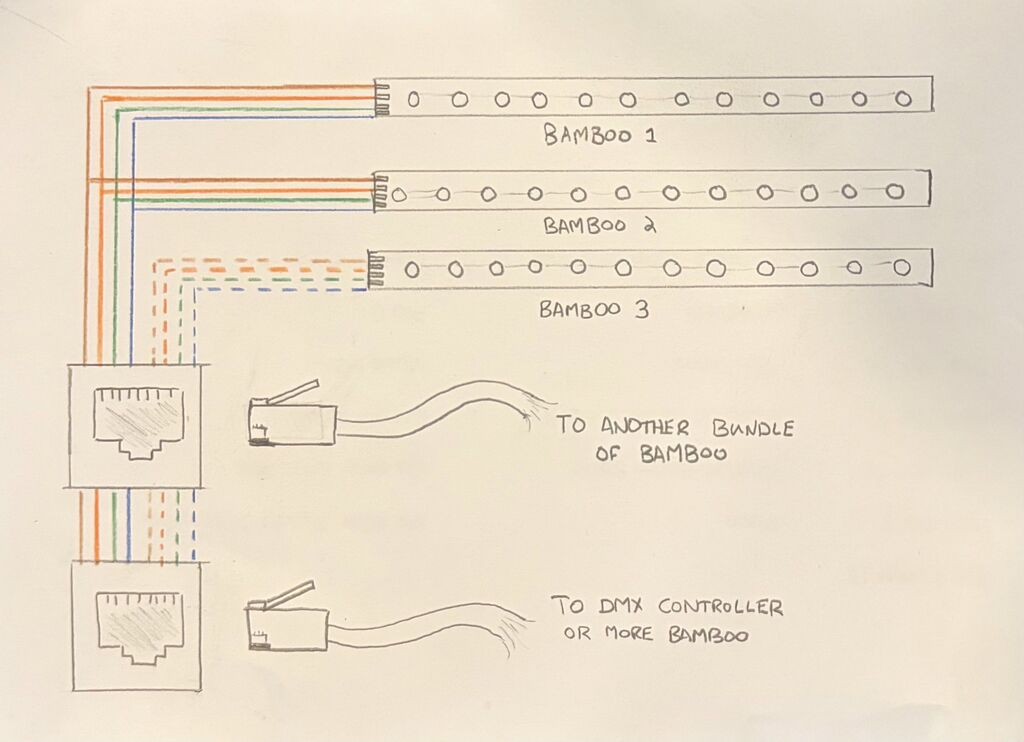
Okay, so there are several considerations for wiring using CAT5 or 6 or whatever. First, you have 8 wires. I need one for ground and we have an orange pair, green pair, and a blue pair. For simplicity, I decided to make two channels of colour for each pair of wires. So each full channel would use 4 wires of my 8. Since I only have three bamboos in the bundle that means that I'll randomize whether a bundle gets two on channel 1 or two on channel 1, if you understand me.
So, yea... if I'm making sense, I cut a strip from my LED strip lighting that had 9 LEDs, I then soldered on my orange (as red), blue, green and brown (for ground) to that strip leaving a nice long length to pass through the bottom of each tube. for the other channel, I do the same thing with a strip of 9 LEDs using the striped orange (for red), striped green, striped blue and striped brown.
The LED strip I've soldered gets taped to the inside of each bamboo tube a few inches down the interior for a nice glow. I experimented with some angled printed inserts with a little mirror from Amazon to reflect the light back up. Noticably it actually didn't do a whole lot so I dropped it. But it's still a nice idea. See below.
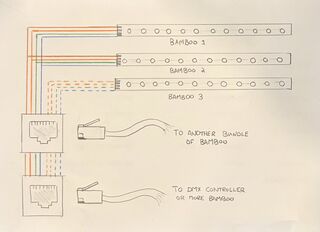
K, yea, you following? Alright... Then second consideration, I need to consider how I'm going to set these up in the theatre. I wanted to be able to quickly wire them up and so self punching keystones and standard networking cable became a brilliant solution. With each bundle having two network jacks, I can run a single network cable from the DMX controller box and then daisy chain everything together in the theatre to reduce wiring.
This can't be done with actual networking, but it totally works in this scenario. See below for a hopefully helpful wiring diagram.
Testing
Like I think I mentioned... maybe not. Testing is important! With my test rig, I tested each bundle once it was wired to make sure it behaved properly with every individual colour. This way I could ensure that all my soldering and cable termination was carried out correctly.
Finally a full bench test was warranted prior to hooking everything up to the DMX controller.
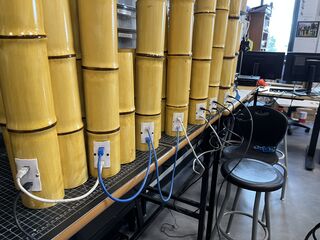
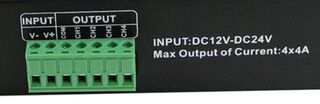
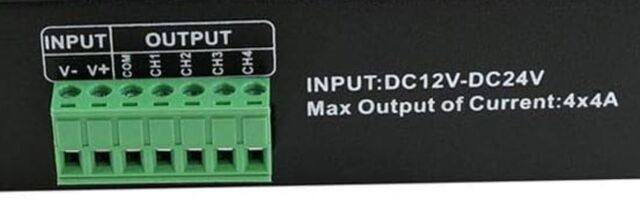
DMXing
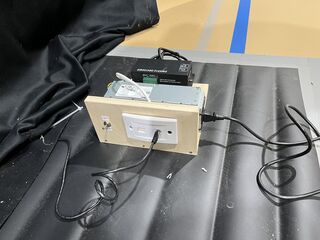
Like you can see above in the parts list, I purchased two 4 channel DMX controllers. The hook up is pretty easy to create my two channels of colour per bundle. I wired up a bit of CAT6 cable to a keystone jack and connected it to the two controllers. As you can see from the picture above, I put solid orange, green and blue to Ch1-3 and solid brown to COM on one controller, and the same but striped for the other controller. I took 12V from my Dell PSU and wired that to my V+ and took gnd from the Dell supply and hooked it up to V-. I mounted it to a piece of plywood and added a switch to allow me to manually override the soft power on the Dell. This can be done on any PC power supply by grounding the green wire to and ground pin.
From here, as I've mentioned standard CAT6 patch cables can be used to wire up the system. You can even do some unorthodox things like this pigtail that basically splits one output into two different segments so you can run cable to two different areas of the theatre.
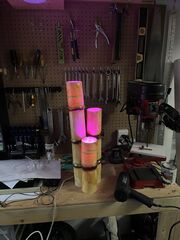
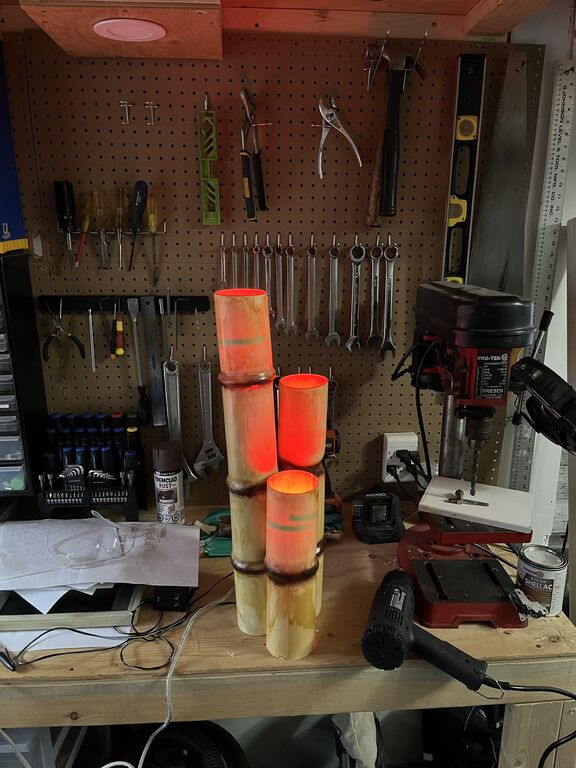
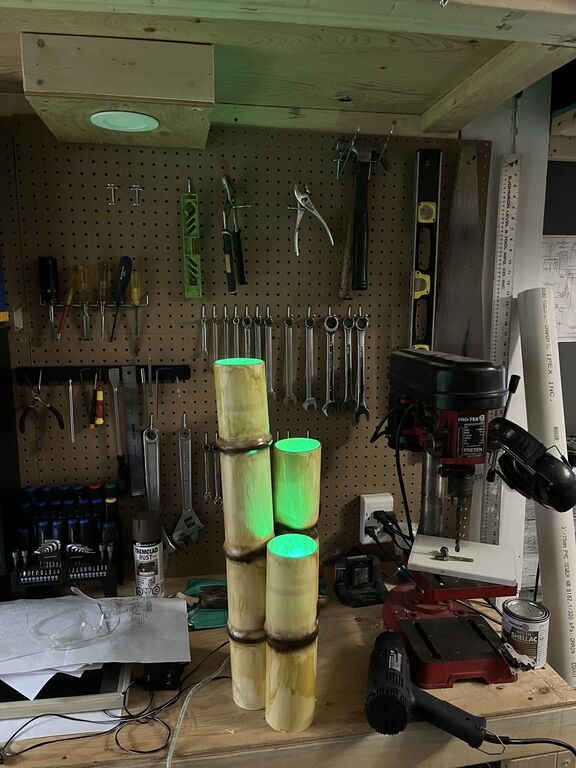
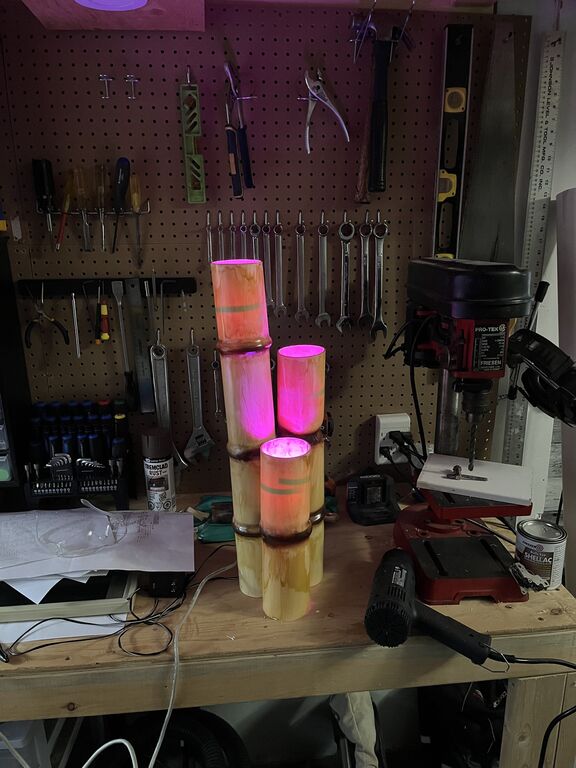
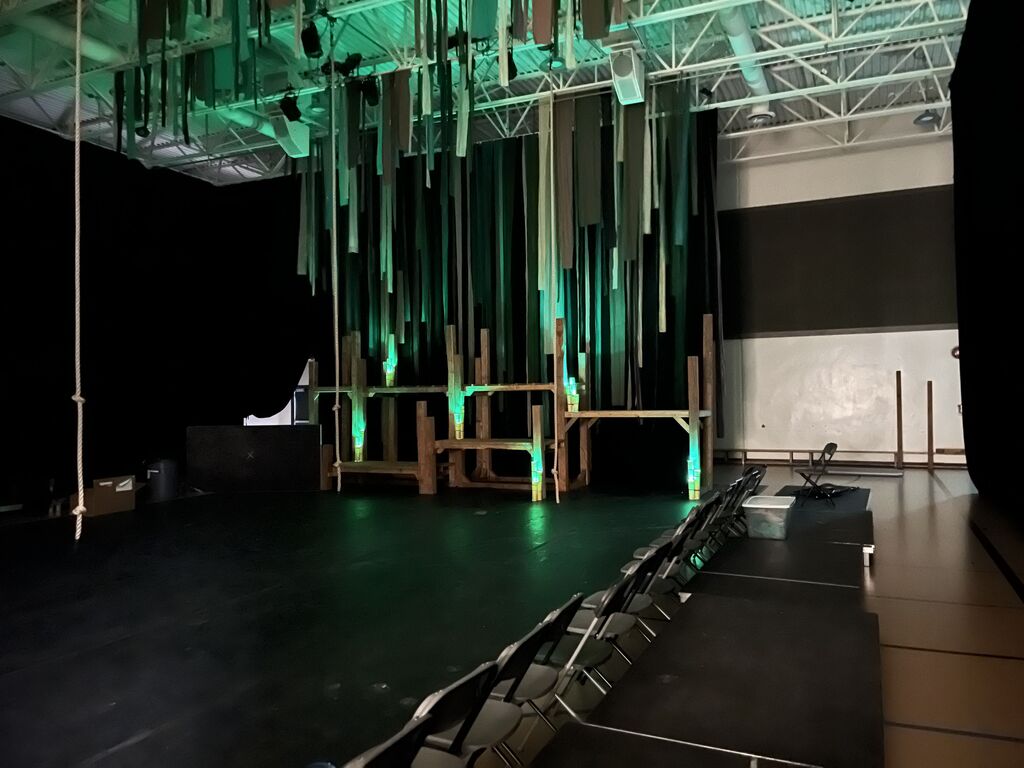
Now that this is done, the work can be handed over to our lighting production team to configure the DMX for whatever lighting they wish to do. Below is a light chase test and finally some images of the how it looks lit up after it's been wired.