
Gemini in 40 Columns
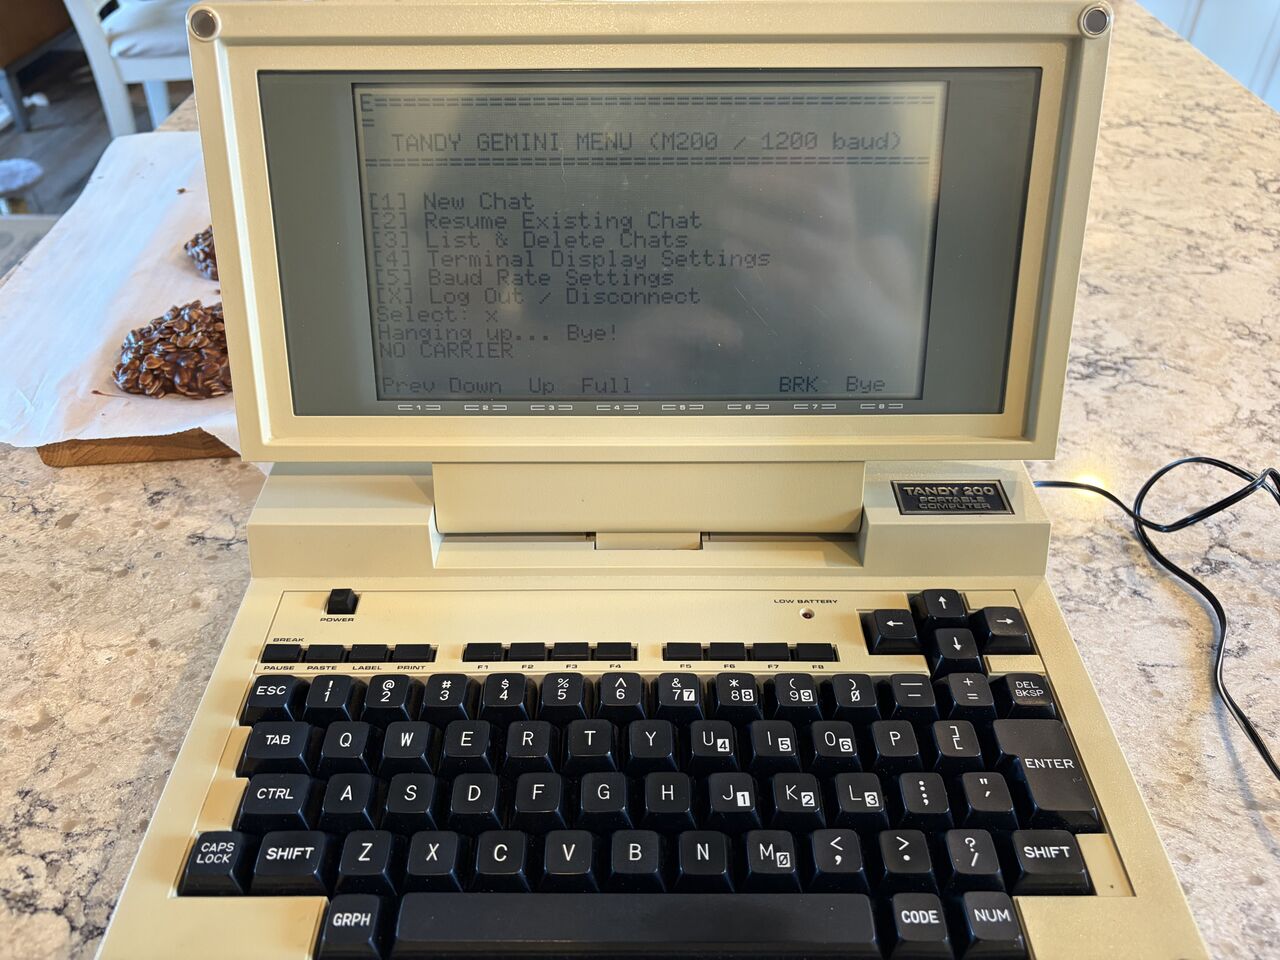
Overview
I admit I got a little bored during one of my evening lectures, thinking back to my adventures with some other BBS service I fired up Google Antigravity to give it this prompt:
"/grill-me Hi Gemini. I would like to chat with Gemini using my Tandy Model 200 or Tandy Model 100 computers. I suspect I would need to do this over my zimodem and host a site of some sort via telnet. I would like to be able to log in via the Tandy 100/200 using my google account and I'd like to be able to access my existing conversations in addition to being able to add/delete and start a new chat session. This would allow others to use telnet Gemini as well using their own accounts. I have a Debian Trixie server already set up that can be used for this project. Please ask me questions!"
After a couple of back and forth tweaks I got it to create me a Python based BBS service that runs on a Debian Trixie VM. You too can now enjoy playing around with Gemini on your ancient 40 column based PC such as my Tandy Model 100 or 200, provided you have a zimodem or some other modem using my service hosted at:
bylenga.ddns.net:2323
You can also host your own BBS or extend this code by following the guide and hosting it yourself. But first here's a demo.
How To:
First. Download the source code from the bottom of this page. You'll also need a server running Linux. This was built on Debian Trixie so obviously it'll work best with this.
Here's Gemini's breakdown of the included files:
tandy-gemini-bbs/
├── config.example.json # Configuration template (ports, keys, model, dev flag)
├── requirements.txt # Minimal production dependencies (FastAPI, Uvicorn, HTTPX, Jinja2)
├── main.py # Single daemon entrypoint (asyncio Telnet + FastAPI Uvicorn)
├── telnet_server.py # Telnet socket server, baud rate pacing, XON/XOFF, VT52 menus
├── terminal_formatter.py # Markdown stripper, 38-col word-wrap, 8/16 line pagination
├── gemini_client.py # Async streaming SSE client for Google Gemini
├── db.py # SQLite persistence for users, PINs, pairing codes, chats, messages
├── templates/
│ └── pair.html # Responsive phone/PC web portal for Google login & PIN display
├── systemd/
│ └── tandy-gemini.service # Systemd service unit for Debian Trixie
├── test_components.py # Automated test suite
└── README.md # Full installation, hardware, and TELCOM guide
From here we follow these instructions:
1. Transfer and Install Files.
sudo mkdir -p /opt/tandy-gemini-bbs
sudo chown -R $USER:$USER /opt/tandy-gemini-bbs
cp -r //* /opt/tandy-gemini-bbs/

cd /opt/tandy-gemini-bbs
python3 -m venv venv
./venv/bin/pip install --upgrade pip
./venv/bin/pip install -r requirements.txt
2. Configure Credentials
cp config.example.json config.json
nano config.json
a) Part 1: Obtaining Your Gemini API Key3. Start the Daemon
The Gemini API key is what allows the server to send prompts and stream responses from Google Gemini.
Go to Google AI Studio:
b) Part 2: Obtaining Google Cloud OAuth Client ID & Secret
- Navigate to https://aistudio.google.com/
and sign in with your Google account.- Create Key:
- In the top-left navigation, click "Get API key".
- Click the blue button labeled "Create API key".
- Choose whether to create it in a new Google Cloud project or an existing one.
- Copy the Key:
- Copy the generated alphanumeric string (starts with AIza...).
- Paste it into config.json as the value for "gemini_api_key".
This is required so users visiting your pairing page (http://your-server:8000/pair) can click "Sign in with Google" and authorize their Google identity to get their 4-digit Tandy PIN.
Step 1: Open Google Cloud Console
Go to the Google Cloud Console
In the top project selector bar, click Select a project > New Project.
Name it something like Tandy-Gemini-BBS and click Create. Make sure this project is selected.
Step 2: Configure the OAuth Consent Screen
Before Google allows you to create OAuth credentials, you must define the consent screen:
In the left sidebar, go to APIs & Services > OAuth consent screen (or search "OAuth consent screen" in the top search bar).
Choose External for User Type and click Create.
Fill in the required fields:
App name: Tandy Gemini BBS
User support email: Your email address
Developer contact information: Your email address
Click Save and Continue.
Scopes: Click Add or Remove Scopes, select:
.../auth/userinfo.email
.../auth/userinfo.profile
openid Click Update, then Save and Continue.
Test Users: While in "Testing" mode, Google only allows accounts explicitly listed as test users to log in. Click Add Users and add your Gmail address (and any friends' Gmail addresses who will be trying it).
Click Save and Continue to finish.
Step 3: Create OAuth Client ID
In the left sidebar, click Credentials.
Click + Create Credentials at the top and select OAuth client ID.
Application type: Choose Web application.
Name: Tandy BBS Web Client
Authorized redirect URIs (Crucial step!):
Click + Add URI.
Enter the exact callback URL for your web companion:
http://:8000/auth/google/callback
(If testing locally on the Debian server itself, you can add http://localhost:8000/auth/google/callback as well).
Click Create.
A dialog will pop up showing:
Your Client ID (ends with .apps.googleusercontent.com)
Your Client Secret
Copy both values into config.json.
# Direct testing
./venv/bin/python3 main.py

# Or install as systemd service
sudo cp systemd/tandy-gemini.service /etc/systemd/system/
sudo systemctl daemon-reload
sudo systemctl enable --now tandy-gemini.service
4. Dial in from the Tandy!
Documents
- Set Stat to 48N1D (Model 100/102) or 58N1DIN (Model 200).
- Press F4 (Term).
- Dial with your ZiModem:
- ATDT debian-server-ip:2323
Tandy 200 TELCOM Reference Manual (PDF)
Downloads
Tandy 100/200 Gemini BBS Source Code (.ZIP)
Links
RS232 to TTL adapters with all signals, including DCD.
Tandy Model 200
Tandy 200 Terminal Settings
Arduino Software Serial with MAX3232
Created: October 5, 2026
Last Updated: October 18, 2026